| Author |  Topic Topic  |
transit80
V4 Mad

United Kingdom
775 Posts |  Posted - 01 May 2013 : 08:23:26 Posted - 01 May 2013 : 08:23:26  
| You can put a coat of primer on first, sand down when dry to key the surface then put a THIN layer of filler on let it harden then sand it down and add another layer and repeat, do not put all the filler on in one go and sand it with your paper round a rubber block.
Chris
|  |
|
Dirtbiker
V4 Guru

United Kingdom
1061 Posts | Posted - 17 Aug 2013 : 18:14:45
| Hi All,
Not been in the garage for ages but have the house to myself for the weekend and it's raining so lets get welding!
Started with tidying up the garage - a good morale booster!
I had already got some filler on this bit so finished (ish) sanding and it looks pretty good. Will need a little bit more fettling but that can wait for now.

Next up was to sort out the front lower corner. Chopped out all the grot.

And got busy!


And the finished article.
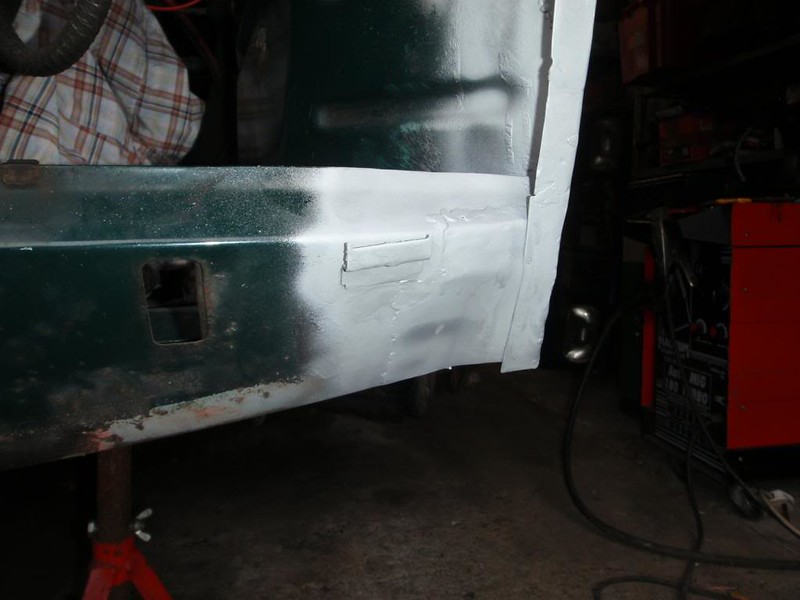

Next up - remember this bit?

Steve the metal worker chopped a nice big hole for the brake pipe for me. Welded the brake pipe bracket on - would have been better to drill the sheet and weld from the back with hindsight but it's done now.
Found a funky LED Macro setting on my camera today.

Hopefully that has inspired me to try and take nicer photos of progress.
Big plans for tomorrow - going to weld in that section then a couple of fiddly bits and may actually finish that side! Thinking i'm going to paint what I have done so far and get the panels back on to give some space in the garage.
Cheers |
Edited by - Dirtbiker on 27 Nov 2021 21:45:58 | |
|
AERO_ADY
Starting Member
United Kingdom
11 Posts | Posted - 17 Aug 2013 : 20:33:00
| | I'm new to this forum but now new to restoring rotten classic cars. Have to say you've done some nice fabrication on the car. Good to see it welded correctly & not just plated over | |
|
Dirtbiker
V4 Guru
United Kingdom
1061 Posts | Posted - 18 Aug 2013 : 19:10:18
| Hi All,
Cheers for the comments Ady - I'm fairly new to all this so it will be good to see your progress and hopefully get a few pointers from an expert! Hopefully yours isn't too rotten though, looks pretty good in the pictures.
Got off to a good early start today - no early angle grinding though, got to keep the neighbours happy!
Started welding on the panel in yesterdays pics but ran out of gas. So decided to busy myself removing the front spring and shock. I'm leaving the running gear in as we are in a rented house and a move is always on the horizon - the plan is I can quickly bolt the back axle back on if I need to move the car.
Next up I thought it would be a good idea to get the last of the underseal off the inner wings. Tried spraying white spirit on and it works a treat. Just let it soak in and it wipes off fairly easily.

Looks nice!
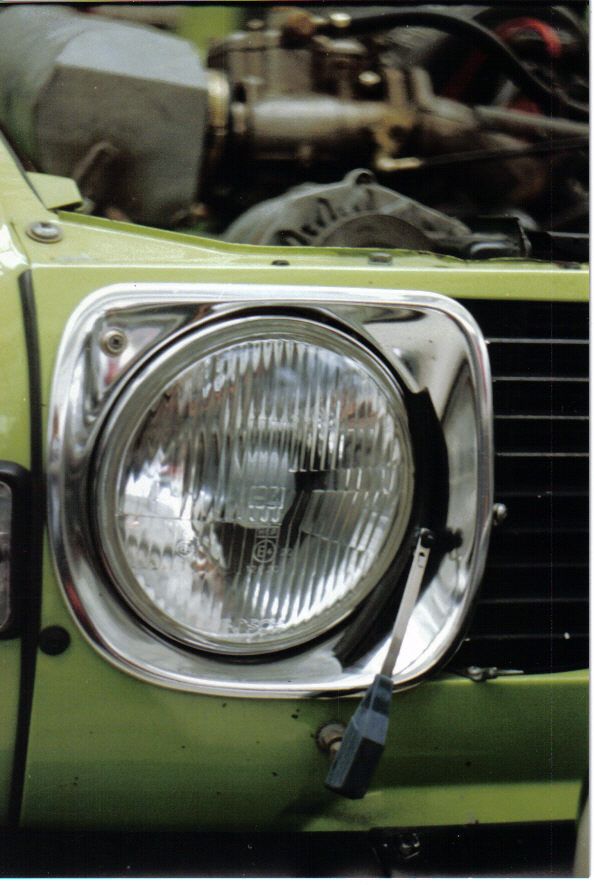
Also, a question. Have a look at the next pic.

I need to hang the wing to trace the shape of the cut out in the front leading edge of the inner wing. Should I have three holes below the sidelight. The top one allows a bolt to sit behind the front panel but should this be there? And I'm guessing the bottom two are correct. Also, what size should the hole be for the sidelight wiring to enter the side of the inner wing. Answers on a postcard...
Not much will happen for a couple of weeks as have a busy week at work then off to the Alps on Friday. But painting should start soon - still not fully decided on the finish. I am thinking of Frosts Chassis Primer, then seam seal the Frosts Chassis Black giving a smooth finish as I think I prefer this to stonechip. Any thoughts appreciated...
Cheers
|
Edited by - Dirtbiker on 27 Nov 2021 21:49:10 | |
|
Dirtbiker
V4 Guru
United Kingdom
1061 Posts | Posted - 04 Nov 2013 : 20:20:49
| Progress!!!
Not loads but still progress...


Finished a few niggly bits of welding and drilled a few holes then two coats of Frost's chassis black primer on the near side including underneath. I'll get some better photos in the daylight but looks amazing. I wanted to get all the welding so far painted and seam sealed while the weather was still warm - should get the tiger seal on then top coats this week.
That's one side done!
Next up chopped out the grot on the other side.


Actually much better than the near side. All straight forward stuff except for the front floor section around the drain plug. That section is probably beyond my skill level so my options will be:
1. Nick Utteridge
2. Malbrads
3. Chop the whole section out and have a sheet metal worker replicate
Any other ideas welcome...
House move looming so got to get this thing back on it's wheels, that should be good motivation.
Cheers |
Edited by - Dirtbiker on 27 Nov 2021 21:53:33 | |
|
Woody
V4 Guru
United Kingdom
2764 Posts | Posted - 04 Nov 2013 : 21:43:07
| Normally there are the two holes at the lower end. The bottom one to secure the wing to the apron, and the upper one is for securing the bumper side braket. The extra hole below the side light has been added by a former owner to keep the panel from vibrating as they probably had lost the proper retaining bracket that fits behind the headlight bezel.
The Comp. Dept used to put an extra wing screw just below the headlight to facilitate removal of the panel without dismantling the headlights bezels. The standard retainers were left off.
The deeper side of square bracket bears against the inner wing to keep front panel in place.
  |
Edited by - Woody on 04 Nov 2013 23:48:31 | |
|
Dirtbiker
V4 Guru
United Kingdom
1061 Posts | Posted - 04 Nov 2013 : 22:10:07
| Hi Woody,
Thanks for the info but I think I've figured it out. Any work (bodges)by previous owners will have been me - I've had this car forever! Those clips are still there on the original front panel but casting my memory back I fitted new front wings (probably 1997) and at the time repaired the leading edge to the inner wings with a bit less finesse than this round of repairs. I think I drilled that extra hole to pull back the new wings to the badly shaped repair to allow the front panel to sit flush. The front panel itself isn't exactly straight either as I drove over it but that's another story altogether...
Cheers | |
|
melle
V4 Guru
United Kingdom
3833 Posts | Posted - 05 Nov 2013 : 13:04:55
| I've made a handful of those retainers a few years back, but never used them myself, way too much hassle. I like to take the front panel off from time to time and I therefore only use the top screws.
1970 96V4 "The Devil's Own V4"
1977 95V4 van conversion project
1988 900i 8V | |
|
Dirtbiker
V4 Guru
United Kingdom
1061 Posts | Posted - 02 Dec 2013 : 17:20:17
| Well, a bit more done.
I now have the left side of the car painted with two coats of Frosts Chassis Black Primer then all the joints seam sealed with Tiger Seal and a coat of Frosts chassis Black over the top. Bit of an issue in that the top coat isn't drying where it's painted over the Tiger Seal - any suggestions...? Obviously it's a bit cold for painting but bought a nice heater from machine mart and the garage gets quite warm. Need to get cracking as we should be moving house in January.
So, while I'm sat wondering why the paint isn't drying I thought I would start getting the back axle ready - mainly because I can do the dirty work outside and not throw dust over the wet paint.
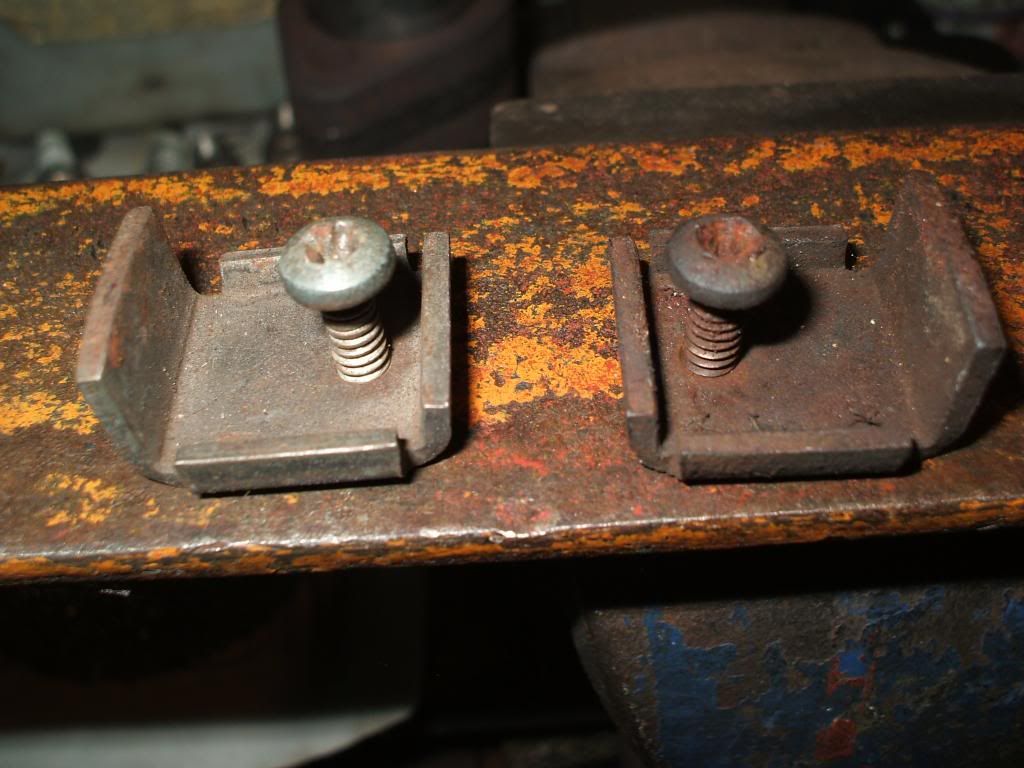
Had a total battle getting one of the brake adjusters off but came up with a good solution.
Gently ground the tops of the rivets of the metal plate and removed.
Next, welded a right big nut on the adjuster - the good thing here is that the heat generated should break the seal.

And off it comes.
 [ [
Weld back on.

A lick of paint.

Pleased with winning that small fight until I realised (after painting!) what I had done wrong... Any one spot the mistake?
At least this job was nice and easy - pushed the rubber bushes out of the trailing arms with a bearing puller.

Next up will be to attack the big one in the middle of the axle.
Cheers |
Edited by - Dirtbiker on 27 Nov 2021 21:57:15 | |
|
Lupo
V4 Fan

Switzerland
105 Posts | Posted - 02 Dec 2013 : 20:09:45
| | In case you are in my age its excusable, thats why our projects take so much time. Sometimes we change the head with feet. | |
|
Dirtbiker
V4 Guru
United Kingdom
1061 Posts | Posted - 29 Dec 2013 : 18:35:41
| Happy festive season everybody!
Had a few hours here and there and made a bit more progress. The near side is now completely finished, seam sealed and painted and looking good - I'll try and get some good pics in the daylight. The rear axle and associated gubbins is all painted and ready for assembly with new bushes.
So, that means I can make a start on the other side. I won't bore you all with too many pics as it's basically a repeat of the near side. But here's a couple anyway as I'm enjoying documenting the work.
Repairs to the rear of the upper sill.
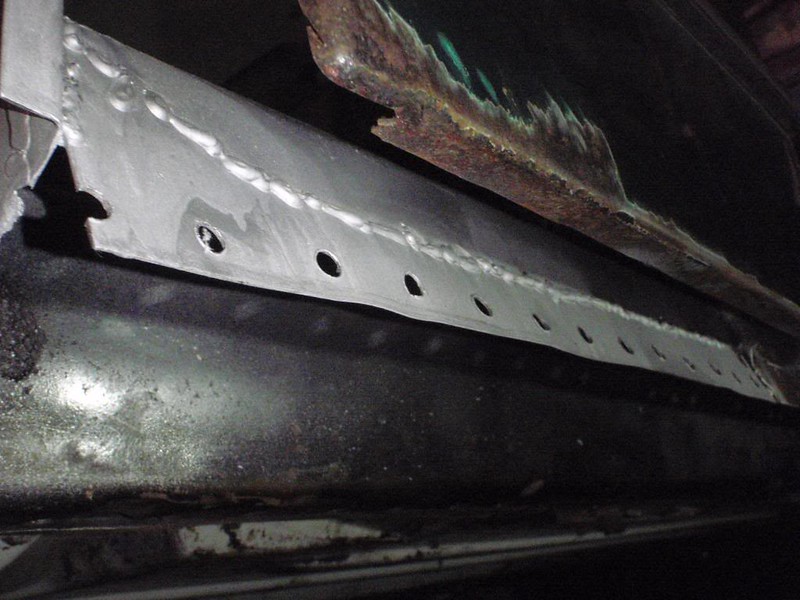
And the front.

And a start on the floor.

The good news is that I have the next week off work and not too much on so hopefully lots of garage time!
Cheers |
Edited by - Dirtbiker on 27 Nov 2021 22:00:03 | |
|
Dirtbiker
V4 Guru
United Kingdom
1061 Posts | Posted - 30 Dec 2013 : 18:54:34
| More action today!
Started by continuing the floor repairs towards the front.
Well, I say started but those two sections and the middle one you can't see took most of the afternoon...
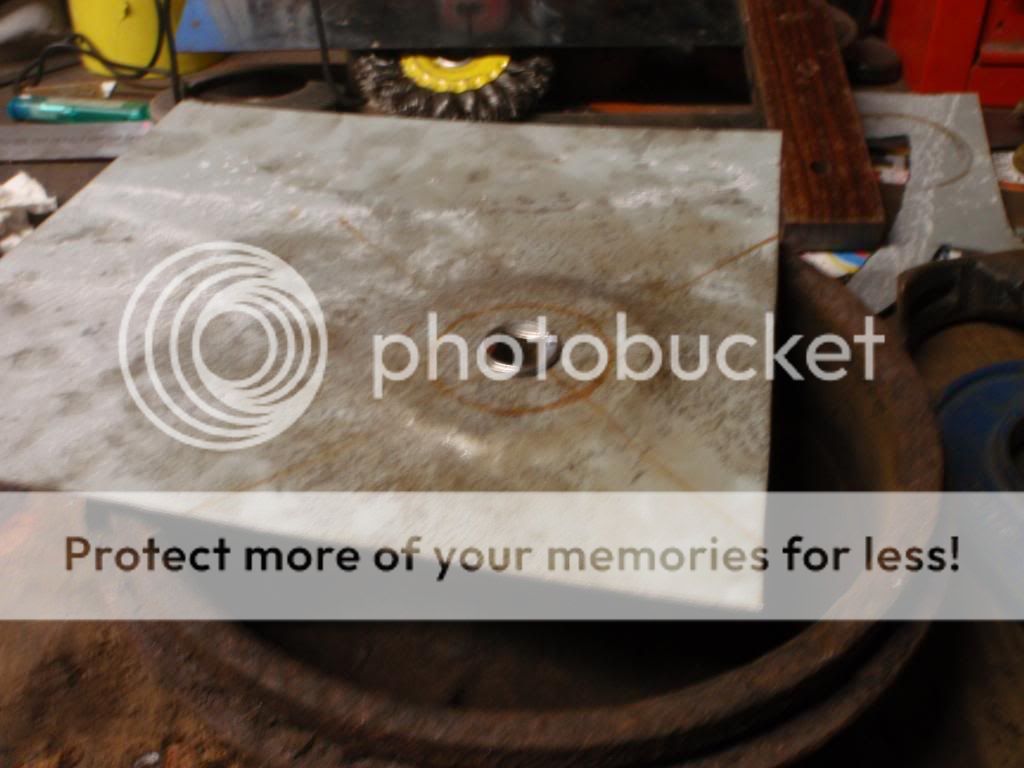
Next up was a big hole where the drivers feet go, tried Malbrads and Nick Utteridge but no luck so lets have a go at making a repair panel.
We really are making this up as we go along... A quick look round the garage and a figure the centre of a rear brake drum is the same diameter as the pressed circular shape. A bit of experimenting and we need something to hold the sheet steel central, drill a hole and match to a socket - bingo!
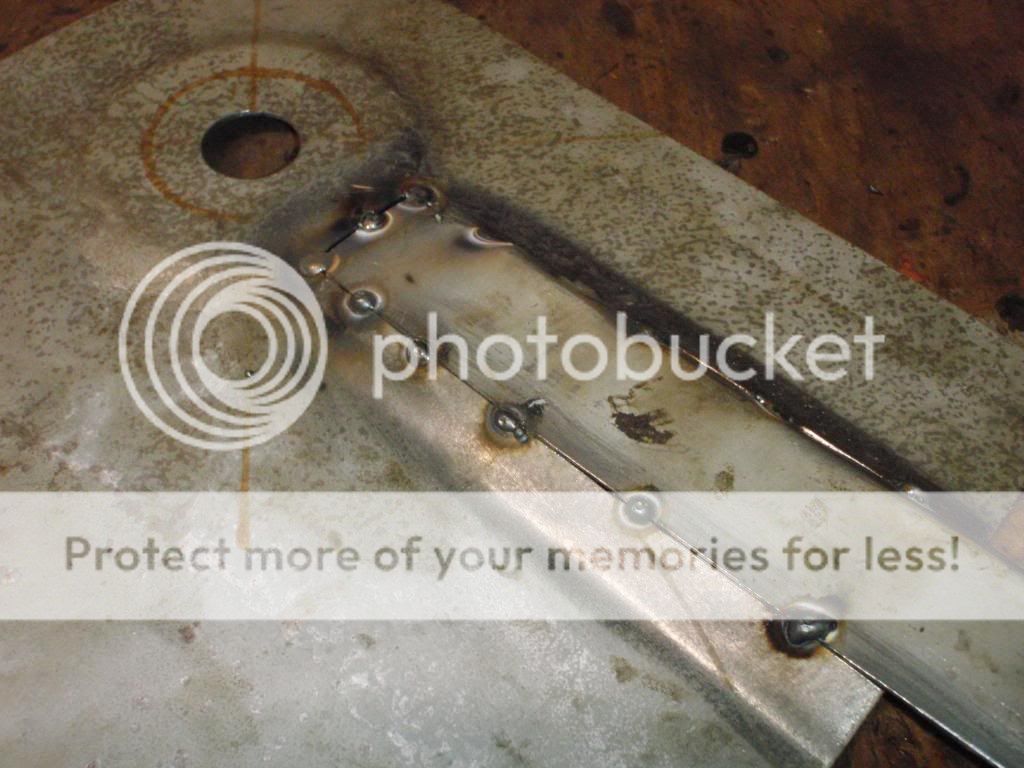
A bit of action with the hammer then cut a slot, a couple of folds and a bit of steel tagged in.
Welded in,
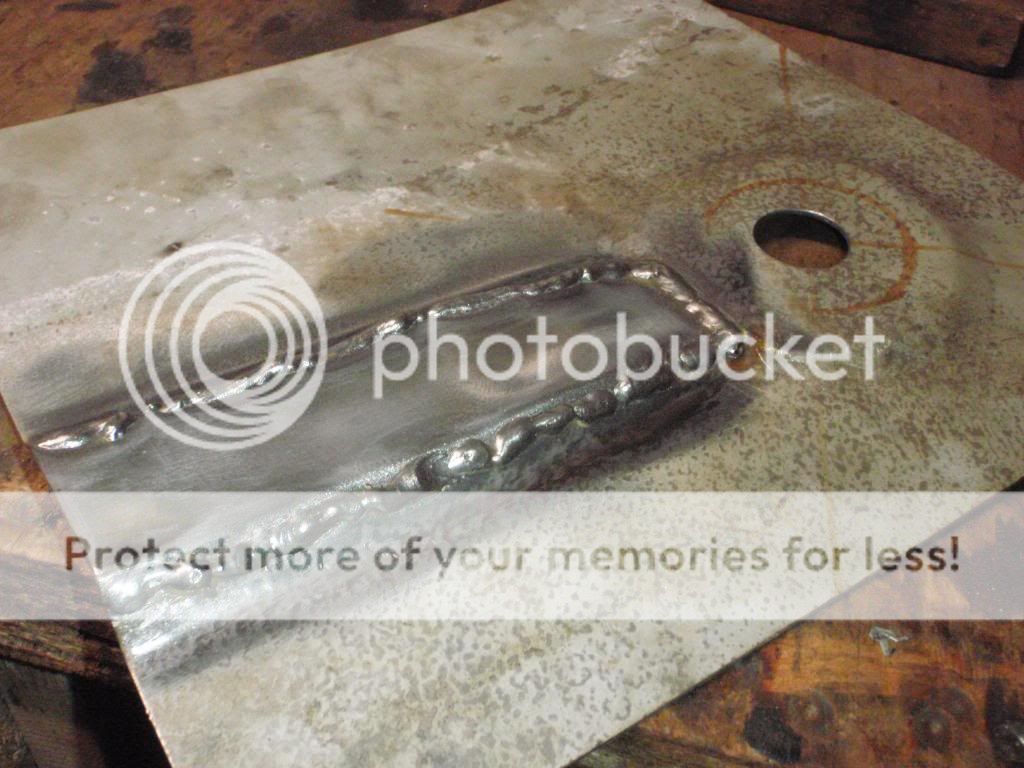
And cleaned up - happy days! The profile on the fold looks steep in the picture but I think it's a trick of the light as it looks pretty good in real life. We'll find out for sure tomorrow as fingers crossed it will be time to weld it in.
Laters | |
|
Dirtbiker
V4 Guru
United Kingdom
1061 Posts | Posted - 16 Jan 2014 : 20:45:45
| Right then People - Update!
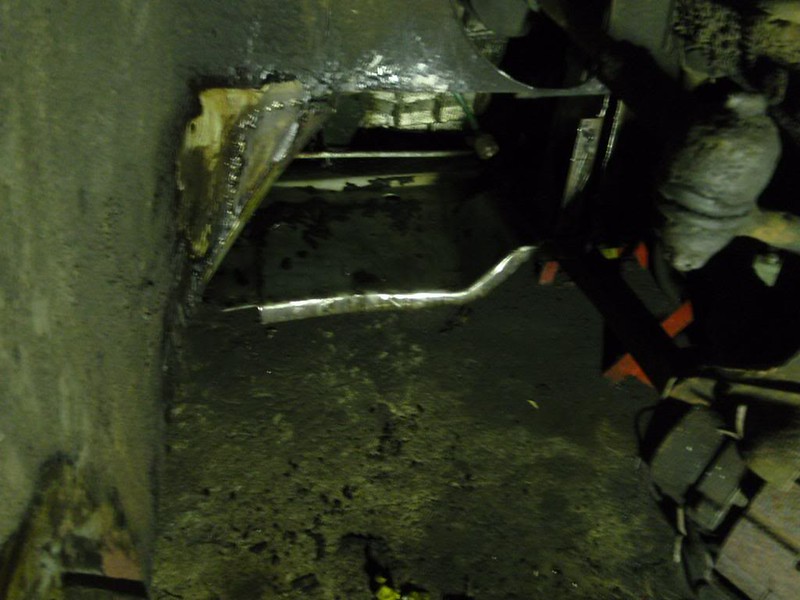
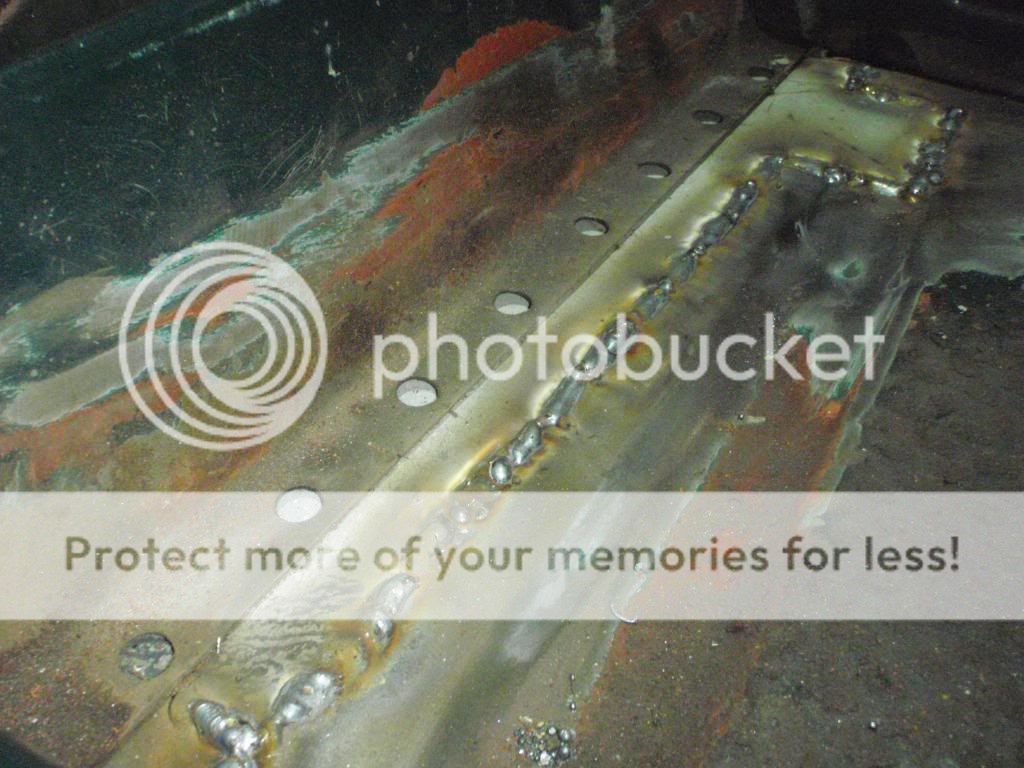
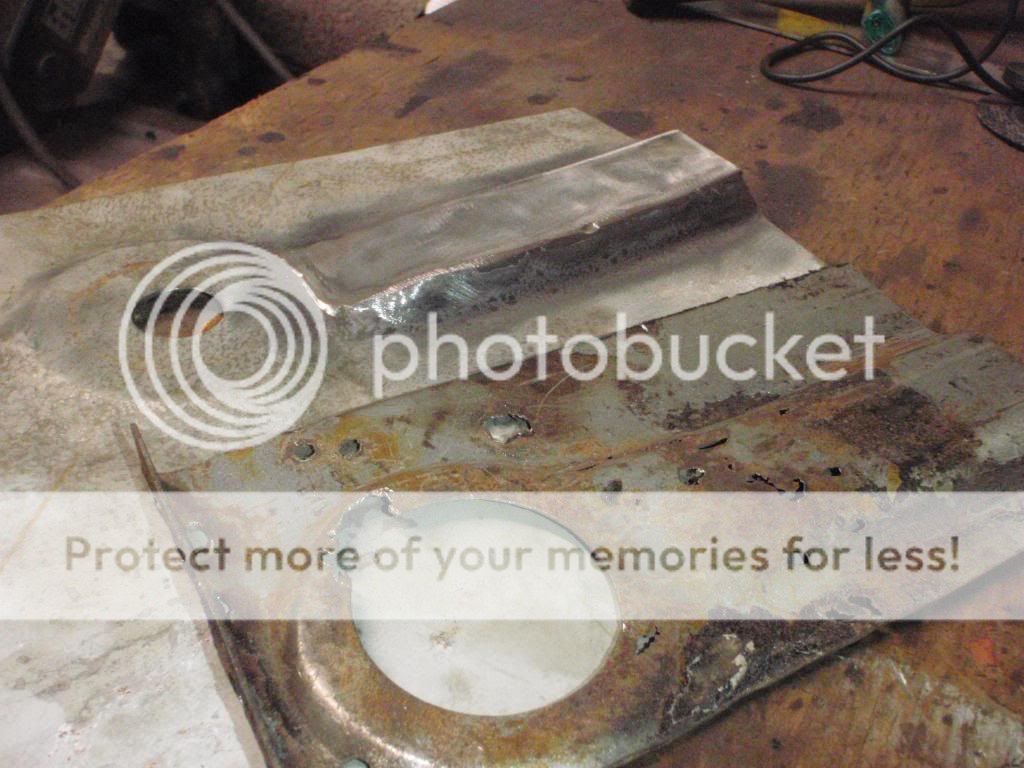
That front floor section welded in

And from underneath

And we have been busy - OS sill sorted and the underside in chassis black primer

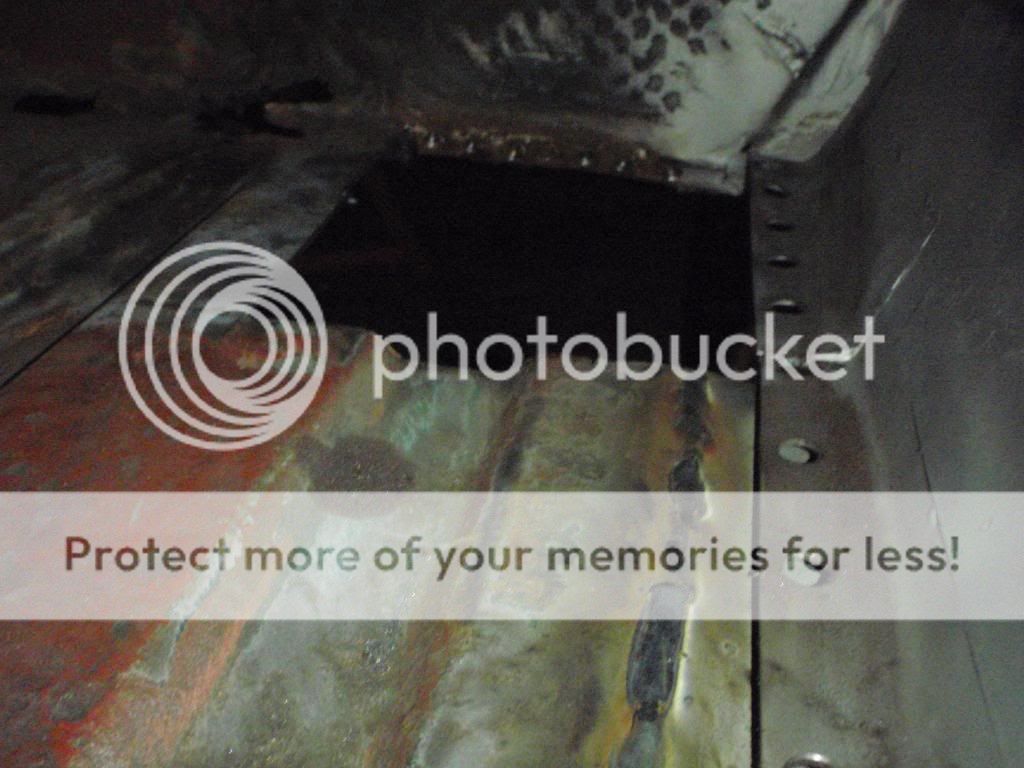
Rear inner wing

One interesting but ultimately bad thing is some corrosion around the rear damper top mounts. I was previously very pleased that the inside of the boot and rear spring and damper top mounts were rust free and in original paint. However, there was the tiniest bubbling near the damper top mount. I decided to drill an exploratory hole (which got bigger and bigger...) to see what was going on. There is rust between the two layers of metal almost invisible without cutting. The only solution is to try to find new pressings for the top mounts and replace (I think). But for now, fill the hole with weld and leave for another day!

So, to summarise, nearly there! If I can keep this up I'll have the front OS inner wing sorted this weekend. All the nuts and bolts off the suspension are off at the platers being zinc coated so we might actually start putting this thing back together one day soon. Swedish Day anyone...?
Cheers | |
|
Dirtbiker
V4 Guru
United Kingdom
1061 Posts | Posted - 22 Jan 2014 : 22:04:46
| Hey All,
Small up date...
Got this load of "Treasure" back from the zinc platers.

Should make putting things back together more enjoyable!
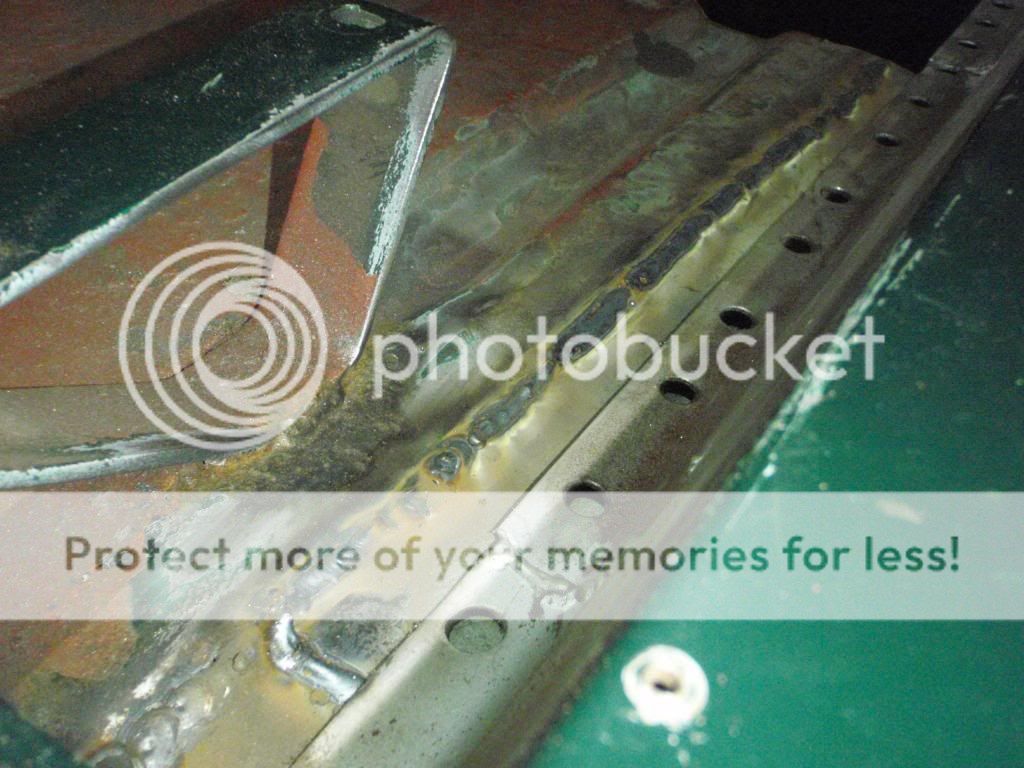
Finished the floor, just needs to be tidied up.

And nearly done the area behind the front wheel - just need to weld on the heavier gauge panel over the top - hence lots of zinc primer on this one to protect it.


Front leading edge of the inner wing to do then I can put the welder away for a while!
Laters |
Edited by - Dirtbiker on 23 Jan 2014 08:17:50 | |
|
Dirtbiker
V4 Guru
United Kingdom
1061 Posts | Posted - 22 Jan 2014 : 22:09:12
| Not sure why the pics aren't working... Any ideas?
Cheers | |
|
| Topic | |
