| Author |  Topic Topic  |
melle
V4 Guru

United Kingdom
3833 Posts | |
green96v4
V4 Mad

Canada
738 Posts |  Posted - 01 Feb 2017 : 16:42:55 Posted - 01 Feb 2017 : 16:42:55  
| | Thanks Melle |  |
|
James Ranaldi
V4 Guru
United Kingdom
1475 Posts | Posted - 01 Feb 2017 : 17:23:50
| Great stuff Melle . . . . .very interesting , as usual.

1968 V4, LHD
1984 99 GL
1992 C900i Convertible
1993 C900 LPT Convertible | |
|
Dirtbiker
V4 Guru
United Kingdom
1061 Posts | Posted - 01 Feb 2017 : 21:39:11
| Hi Melle,
Excellent update and inspirational use of a router! Did you use the same technique for porting the exhaust ports on the heads or did you get them in the mill?
Cheers
Gareth | |
|
melle
V4 Guru
United Kingdom
3833 Posts | Posted - 01 Feb 2017 : 22:51:54
| I would in no way pretend my "porting" is up to any standard, but the engine sounds great and it seems to pull well, even if not properly tuned yet. I specifically bought that router as its manufacturer actually intended it to double as a die grinder. I got it used off eBay for a tenner and I can highly recommend it. Unfortunately it occasionally sounds as if one of the bearings is spinning in its housing, so it looks like perhaps I need to swap that out. I blew tons of mdf dust out of it when I first got it, so hopefully washing out the bearing and repacking it with fresh grease does the trick.
I wish I had a mill! I didn't have the die grinder either when I did the exhaust ports a few years ago (I can't believe this engine has been sitting for three years already!), so I made do with my trusty Aldi pillar drill: http://www.saab-v4.co.uk/speedball/topic.asp?TOPIC_ID=3663 I love the Pferd burrs by the way and they work even better with a proper die grinder than with a drill.
One of the pictures on the previous page and some in the linked thread come out very large for some reason and I have no idea how to resize them so they fit with the others; sorry for that. All my photos are taken with the same simple Canon IXUS camera or my iPhone and they're all hosted on Flickr. I can't imagine it's the camera settings; I'm not much of a photographer so I prefer not to touch the camera/ phone's default settings.
www.saabv4.com | |
|
Derek
V4 Guru
United Kingdom
2191 Posts | Posted - 02 Feb 2017 : 00:26:40
| quote:
Originally posted by green96v4
those little rocker cover spreaders are cool - any idea where you got them?
You'll be able to find them easily over there for Chev V8. That will give you 2 sets. eBay or a local flaps. | |
|
Dirtbiker
V4 Guru
United Kingdom
1061 Posts | Posted - 02 Feb 2017 : 15:49:12
| I remember your thread in the link but I thought you had a mill. I also have a cheap pillar drill and would like to try this myself.
I even have almost the exact same Bosch router - if I destroy it in the garage that might get me out of making a window frame I am supposed to be doing in the house!
Can you recommend a supplier for the Pferd cutters and did you manage with just one or do you have a selection, how long do they last?
Cheers | |
|
melle
V4 Guru
United Kingdom
3833 Posts | Posted - 02 Feb 2017 : 16:15:53
| Keep an eye on eBay, I recently bought some more and if I recall correctly I paid about £7-£8 apiece (new). They're not your typical Far East B&Q products, but professional quality burrs. I never had one go dull yet, but they can be resharpened (not sure if that's cost effective if you can buy them cheap). Make sure you buy them with the correct shank diameter, most die grinders and routers are either 6 or 8mm. I have Z3 and Z5 burrs and I find they both give a good finish on cast iron as well as on aluminium; however, the latter requires a lubricant (WD40 works very well). You can find very informative Pferd catalogues and technical data sheets through Google.
www.saabv4.com | |
|
melle
V4 Guru
United Kingdom
3833 Posts | Posted - 06 Feb 2017 : 13:36:10
| quote:
Originally posted by melle
One of the pictures on the previous page and some in the linked thread come out very large for some reason
The fault is with Flickr. Image sizing in this and the linked thread now sorted, please let me know if you find odd sized pictures in other threads and I'll resize them as well.
www.saabv4.com | |
|
melle
V4 Guru
United Kingdom
3833 Posts | Posted - 30 Apr 2017 : 19:20:53
| Got some stuff done over Easter, so here's a short update.
I started by installing the rev counter I've had on the shelf for years and making a small under-dash panel for the new choke cable pull and some auxiliary gauges and switches. Here's a cardboard mock-up I made to check dimensions:

I made the final product out of bead blasted stainless. Forgot to take a pic, next time. It's a temporary solution anyway, I plan on building a dash that houses all clocks and switches for a less cluttered look, but I needed something that works for the time being. I like this a lot:

Source: http://www.saab-v4.co.uk/speedball/topic.asp?topic_id=146
I can't afford a Sonett tach I'm afraid, but I have a Smiths one of the same diameter, I think it's from an MG. I want some extra gauges, so I think I'll get rid of the clock/ 96 badge and ashtray positions, move the heater controls to where they are on RHD cars, and reposition the fan and light switches so I can add 2 52mm gauges and some extra switches and control LEDs. I also need to do something about the ugly Innovate MTX-L AFR gauge I just installed, I think I'll start by painting the bezel matt black, but it'll probably stand out like a sore thumb anyway. I think I may be able to knock something up with a bezel from an old VDO gauge. The Porsche oil pressure gauge you see in the cardboard mock-up will go, it's intended for my engine test bench and for the car I'm looking for something that blends in a bit better with the other gauges.
Then onto the exhaust. I've disliked the front section ever since I installed it:
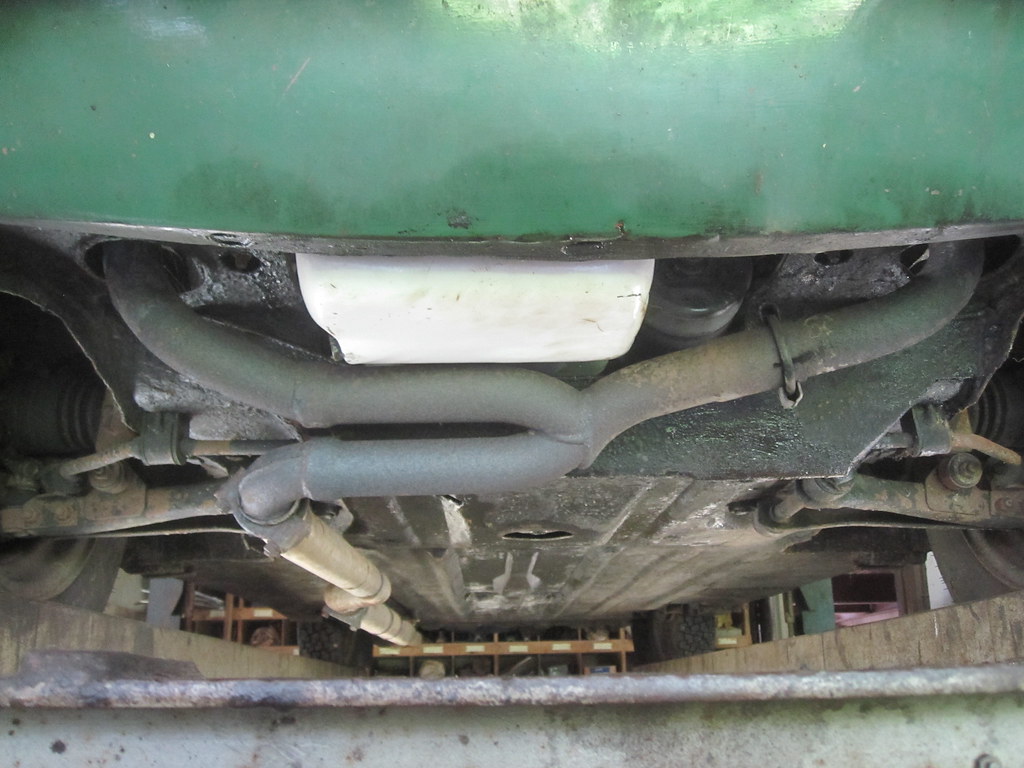
Installing the Innovate kit was a good reason to finally get rid of it, as it needs the lambda sensor to sit about one metre from the exhaust manifolds. I planned on using universal bends and modifying Renault 4 downpipes as they're very cheap and have the right diameter:
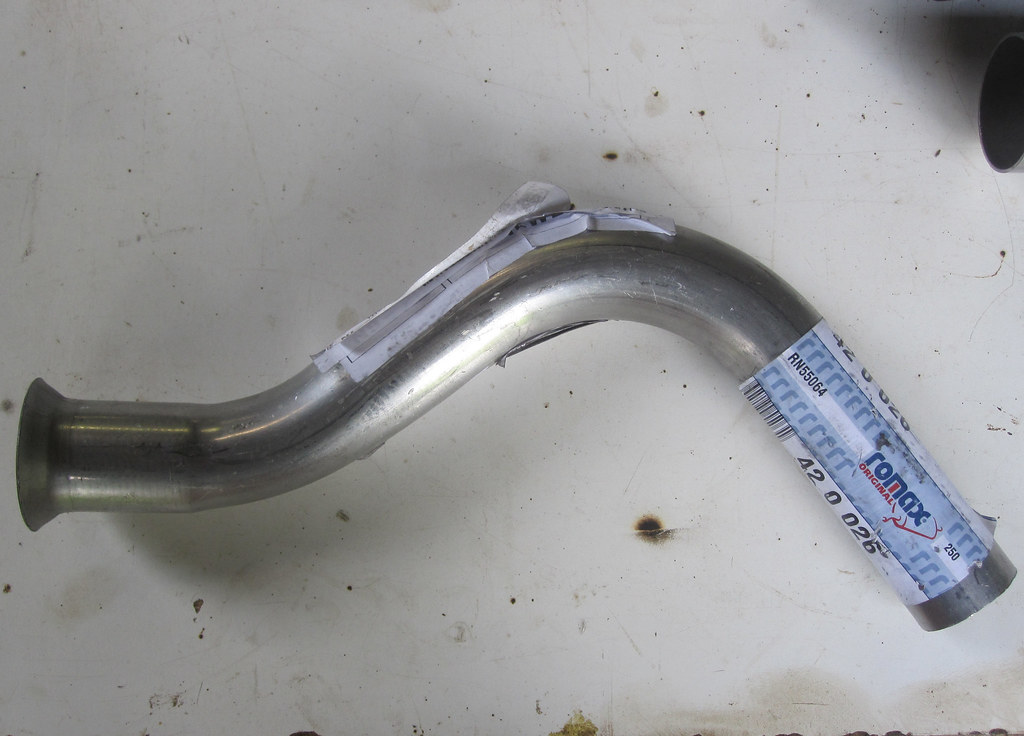
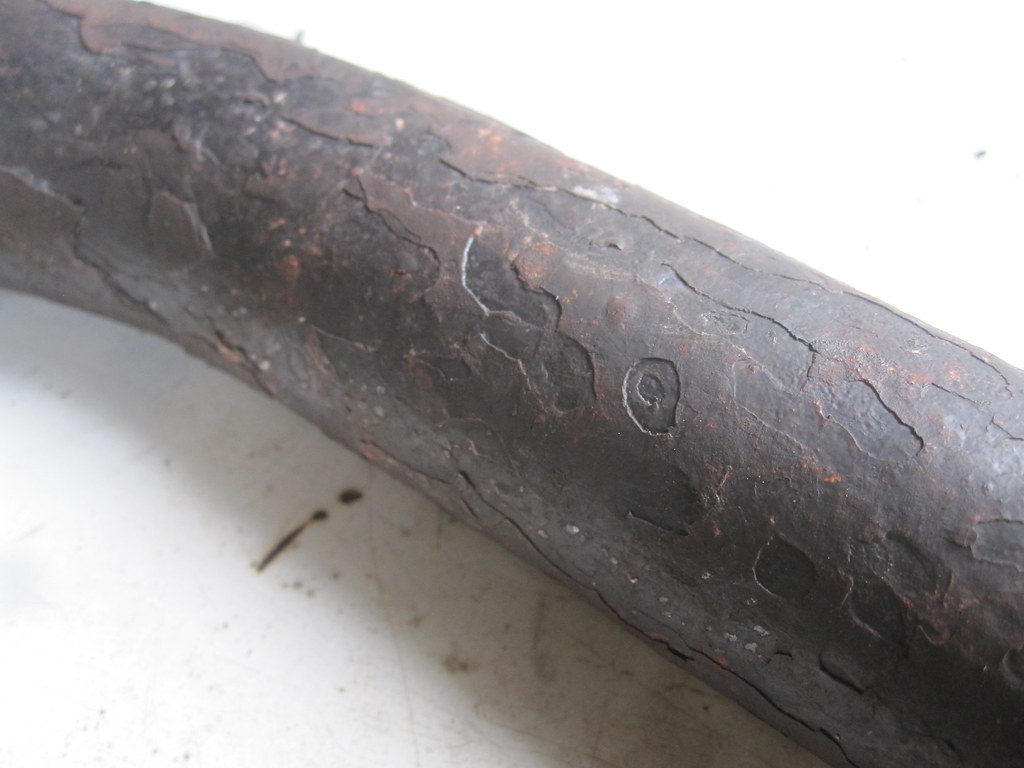
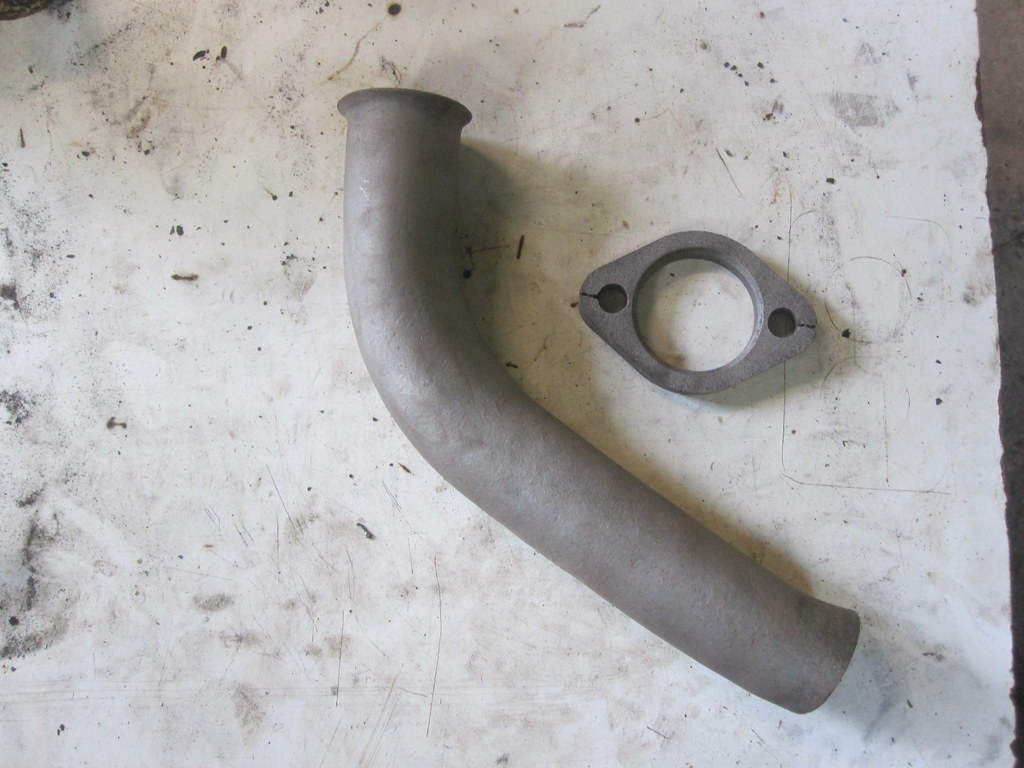
I thought I would need new downpipes as the Jetex downpipes looked like they were too badly corroded for re-use, they looked very scruffy (they'd been heat wrapped in the past which hasn't done them any good). After blasting them they appeared to be pretty sound though, so I recycled them along with the Y-piece. They're a weird material, but it welds great fortunately.
I'm sure the Renault downpipes and the (expensive) Y-piece I bought will come handy for the 95 at some point.
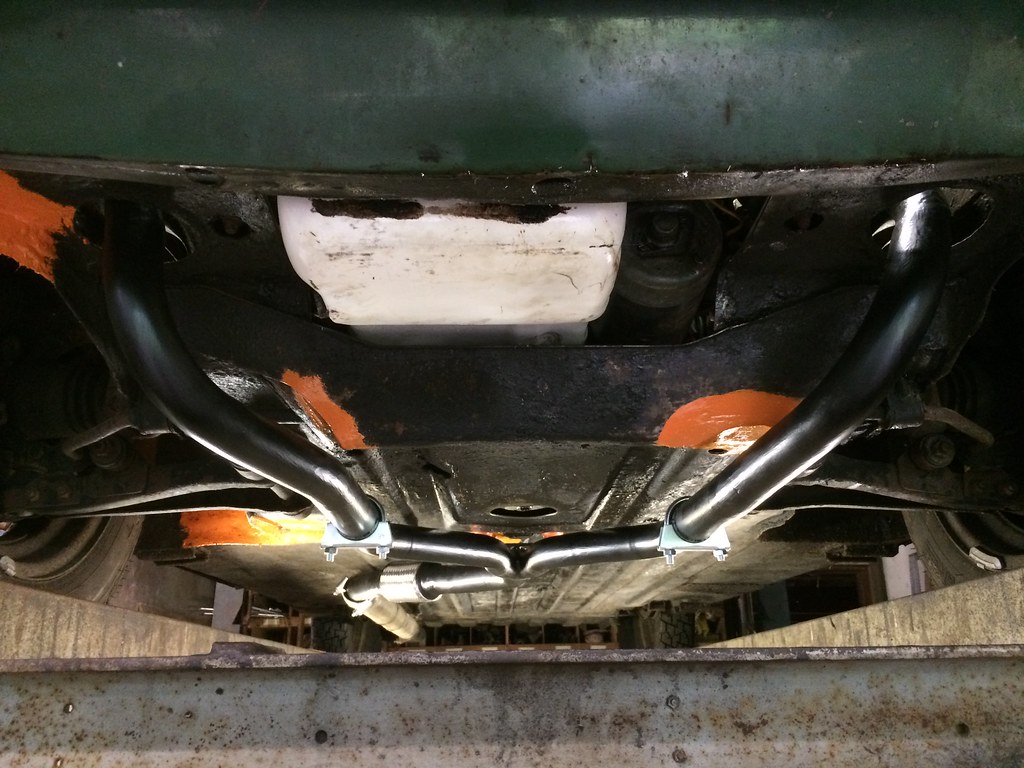
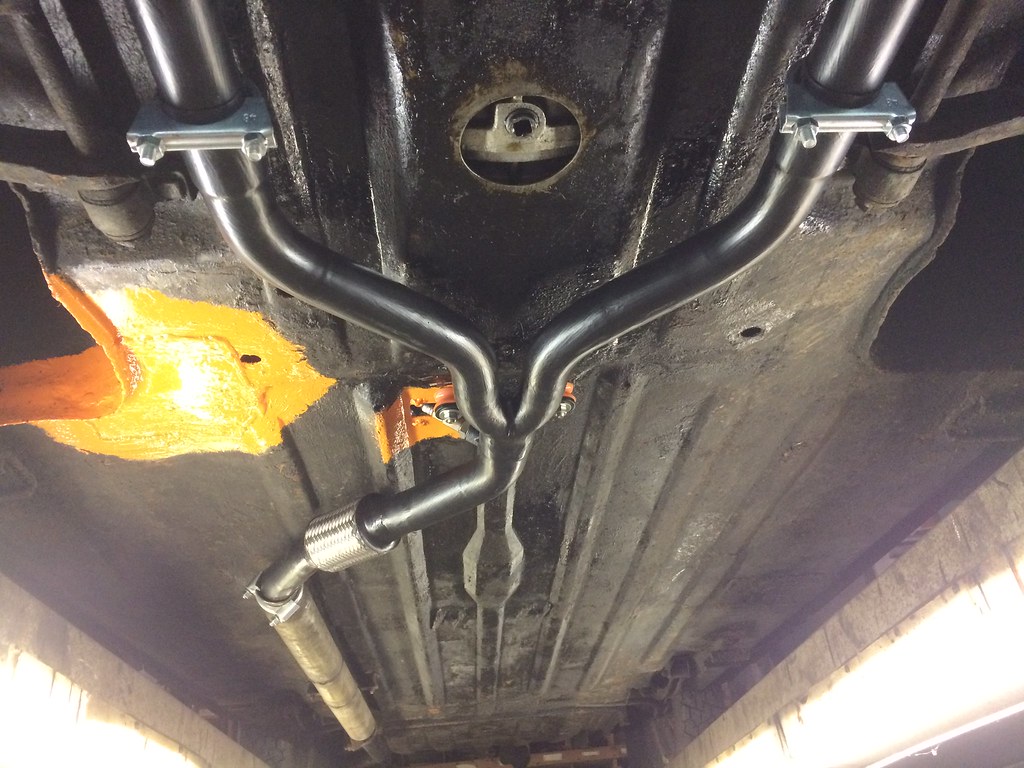
This is what the new assembly looks like, not 100% happy with the symmetry, but no one will notice it anyway:

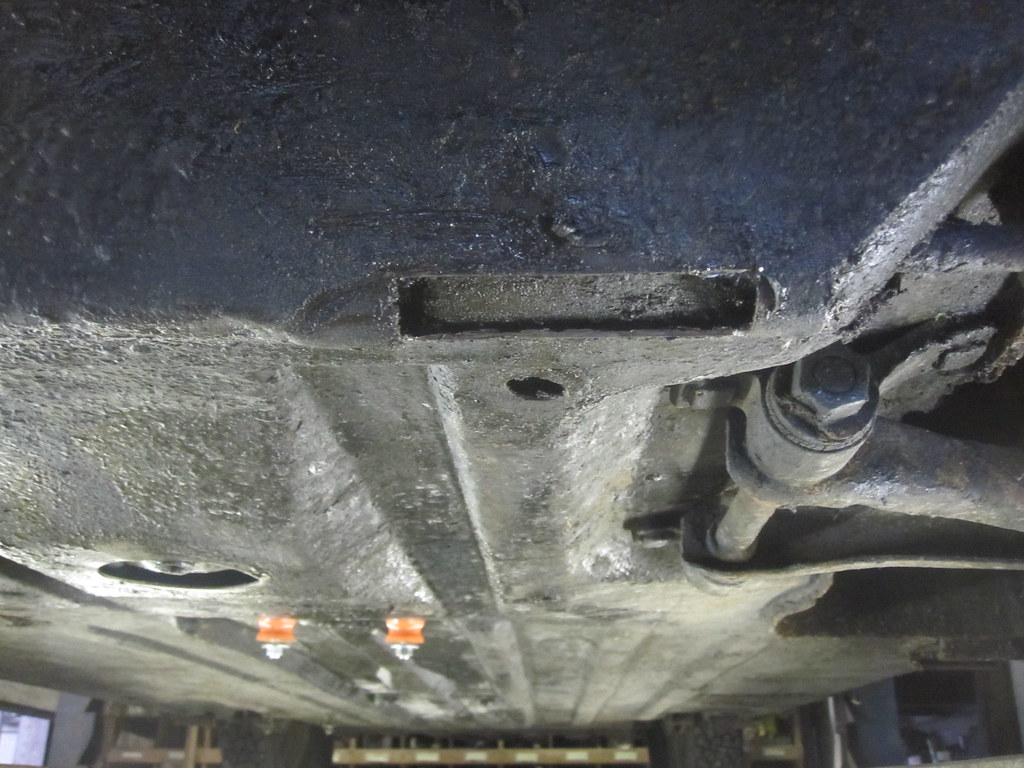
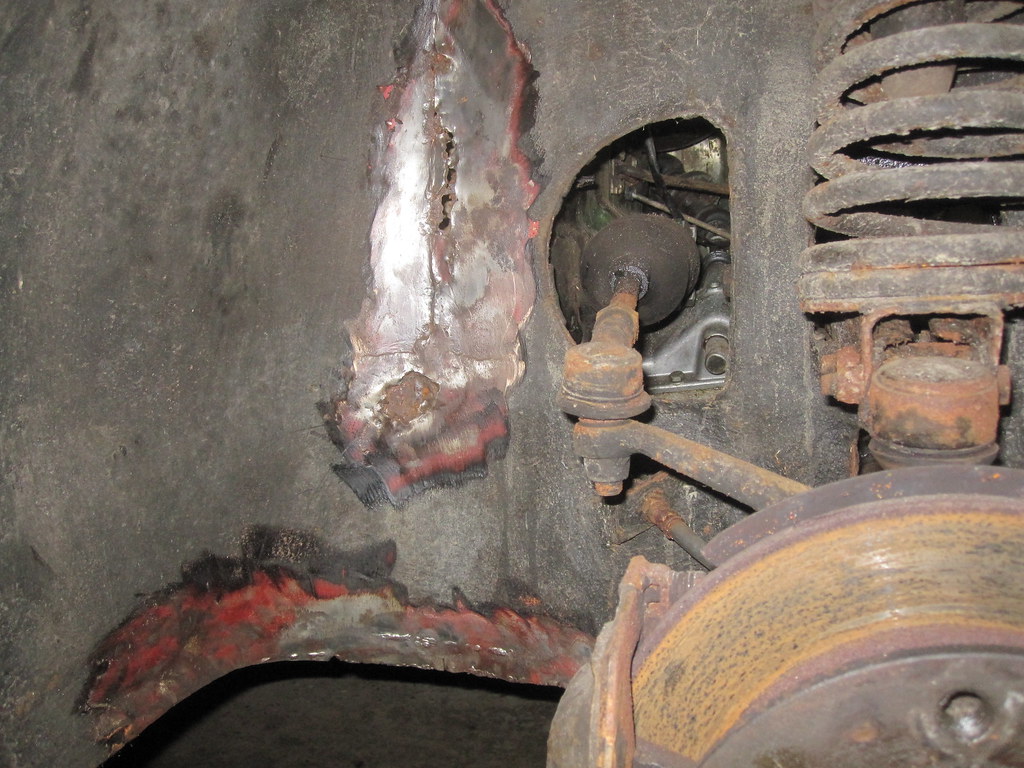
The downpipes are 1 3/4" and everything after the Y is 2", all bushes/ hangers will be PU. I forgot to take a pic of it on the car, but I did photograph one of the cut-outs I made in the front stiffener/ jacking point to be able to mount the exhaust 1cm higher up as the car sits very low. I'll cap the hole of course to regain rigidity, but only after a thorough clean as the floor and front valance are very, very sticky at the moment (yet rust free as a result!).
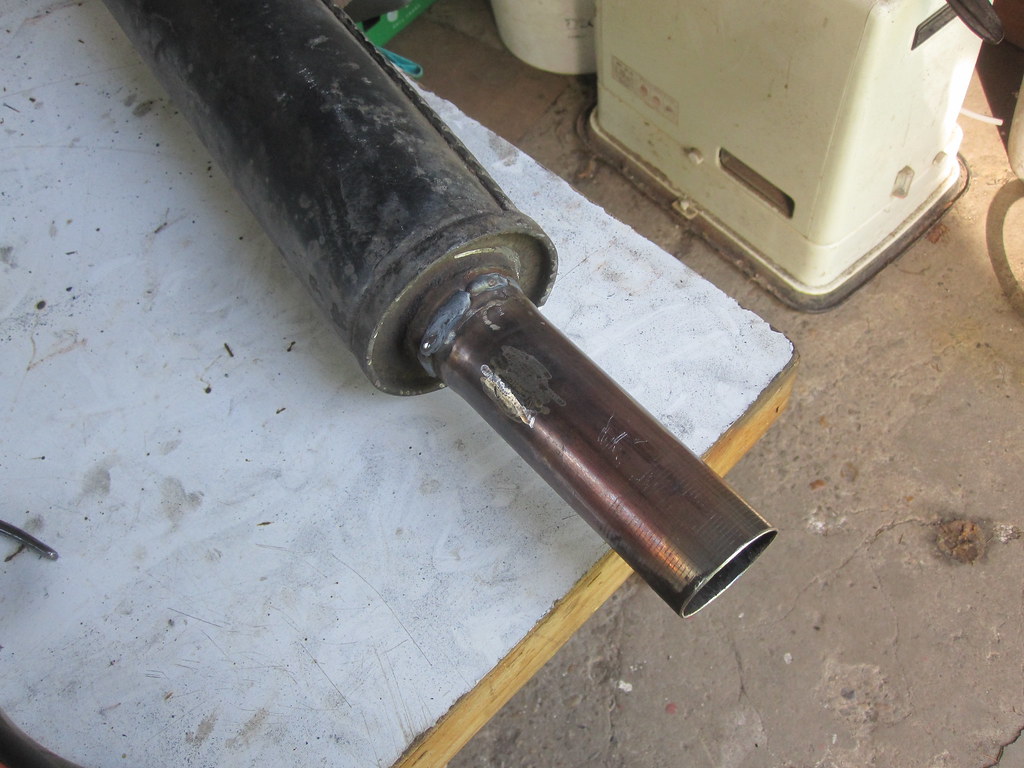
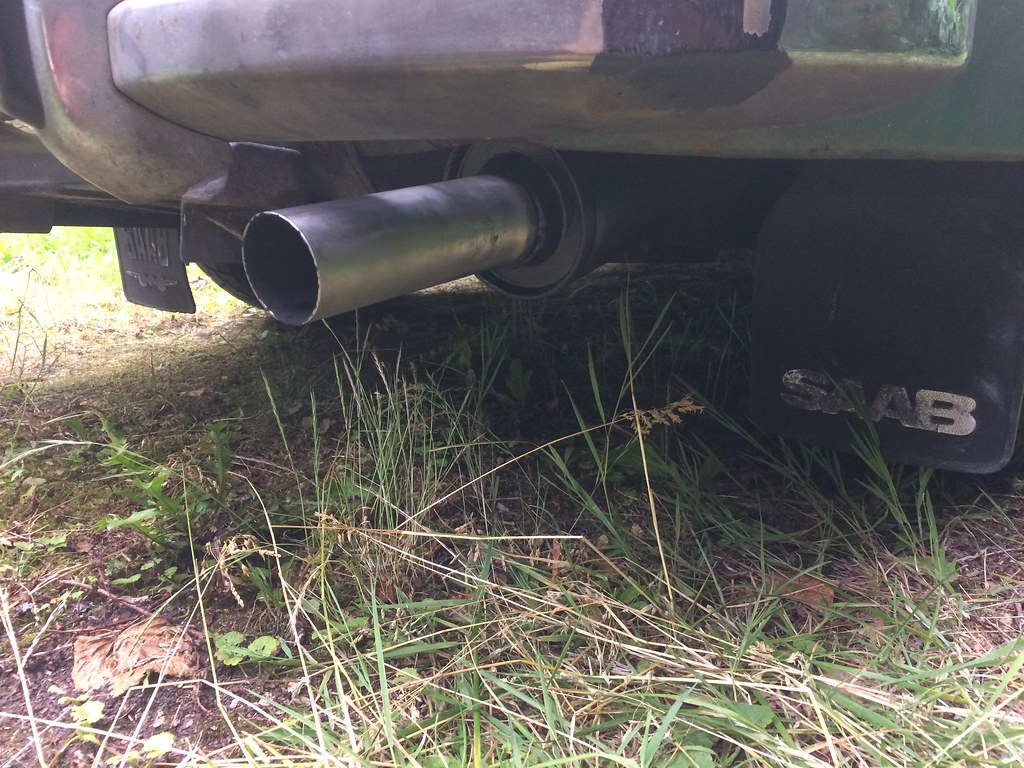
I also finally got rid of the stainless end piece, something else I've never liked about the Jetex. Turns out the tip is lined with fibreglass and the inner pipe has two holes, sorted easily enough though. Looks much more acceptable to me now:
I inevitably ran out of time at some point, so next time I'll smarten up some of the welds and give the whole assembly a coat of high temp matt black paint before installation. Looking forward to hearing how it sounds in concert with the new engine.
Lastly I couldn't pass up a new old ex Ford dealer stock V4, a bit dusty on the outside but impeccable internally:
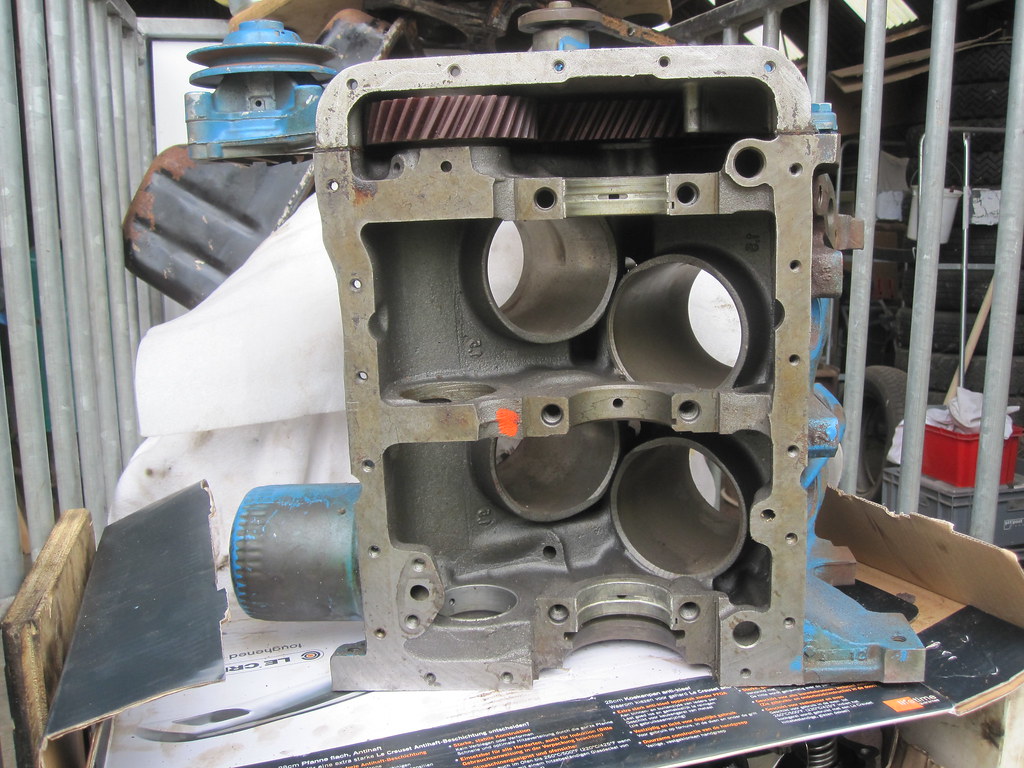
It's missing a lot of parts, but enough useful stuff left for me and it was pretty cheap too. Shame the crank bearing caps are missing, I have plenty but I believe they're line bored. Can anyone confirm this?
www.saabv4.com | |
|
melle
V4 Guru
United Kingdom
3833 Posts | Posted - 30 Apr 2017 : 19:29:52
| quote:
Originally posted by melle
I specifically bought that router as its manufacturer actually intended it to double as a die grinder. I got it used off eBay for a tenner and I can highly recommend it. Unfortunately it occasionally sounds as if one of the bearings is spinning in its housing, so it looks like perhaps I need to swap that out. I blew tons of mdf dust out of it when I first got it, so hopefully washing out the bearing and repacking it with fresh grease does the trick.
Replaced both bearings boy they were worn! Grinder works as new now, very much looking forward to the next porting job.
I also bought a new blasting cabinet and modified it to suit my requirements. I have two now, one for bead blasting (for non-ferro and plastic deburring and surface finishing) and one for aluminium oxide blasting (for steel and cast iron paint and rust removal).
www.saabv4.com | |
|
melle
V4 Guru
United Kingdom
3833 Posts | Posted - 30 Jun 2017 : 18:21:47
| 'Time is a dimension of all workmanship. It all fails, to be sure: but it fails either sooner or later.' wrote David Pye (https://en.wikipedia.org/wiki/David_Pye_(furniture) ) in his magnificent book 'The Nature and Art of Workmanship'. I was in NL the past couple weeks and I found some time to fix some more of the 96's multiple failures. The MOT runs out halfway September and I'm very keen to keep it in test because rolling projects keep me motivated.
Welding.
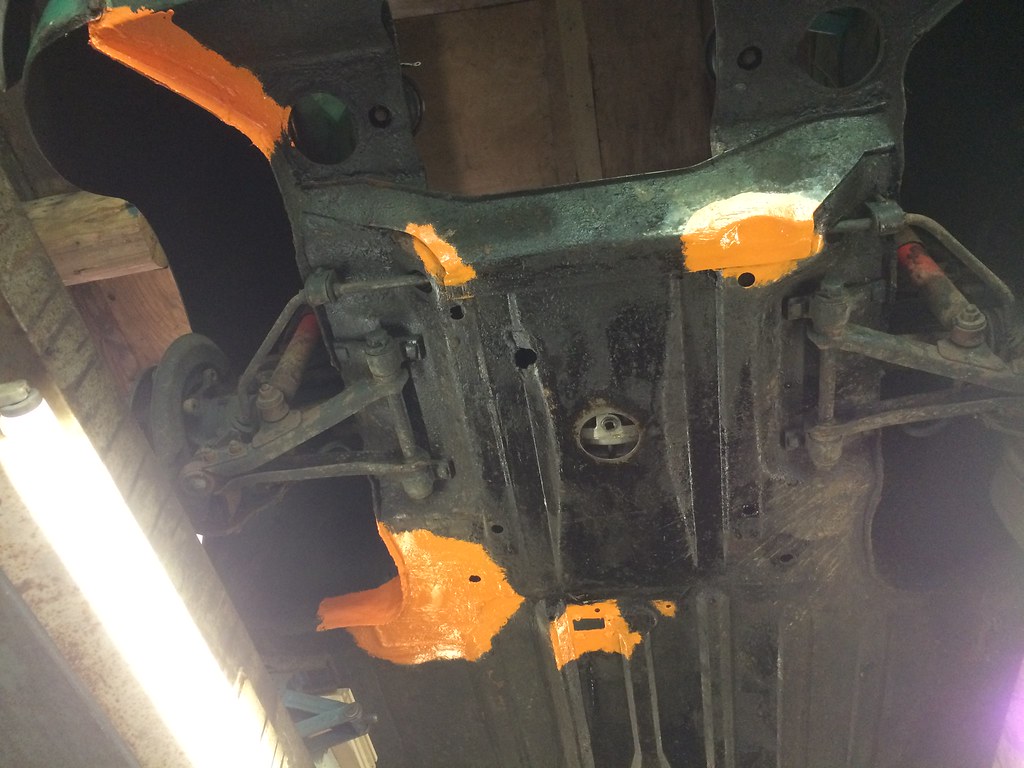
Last time I worked on the car, I'd seen some suspect areas. So, as before: cut, fit, stitch, some seam sealer (from Bilthamber this time, excellent stuff!) and a lick of paint. Schutz will follow later. Guess you all know the process, so I'll let the pics do the talking:
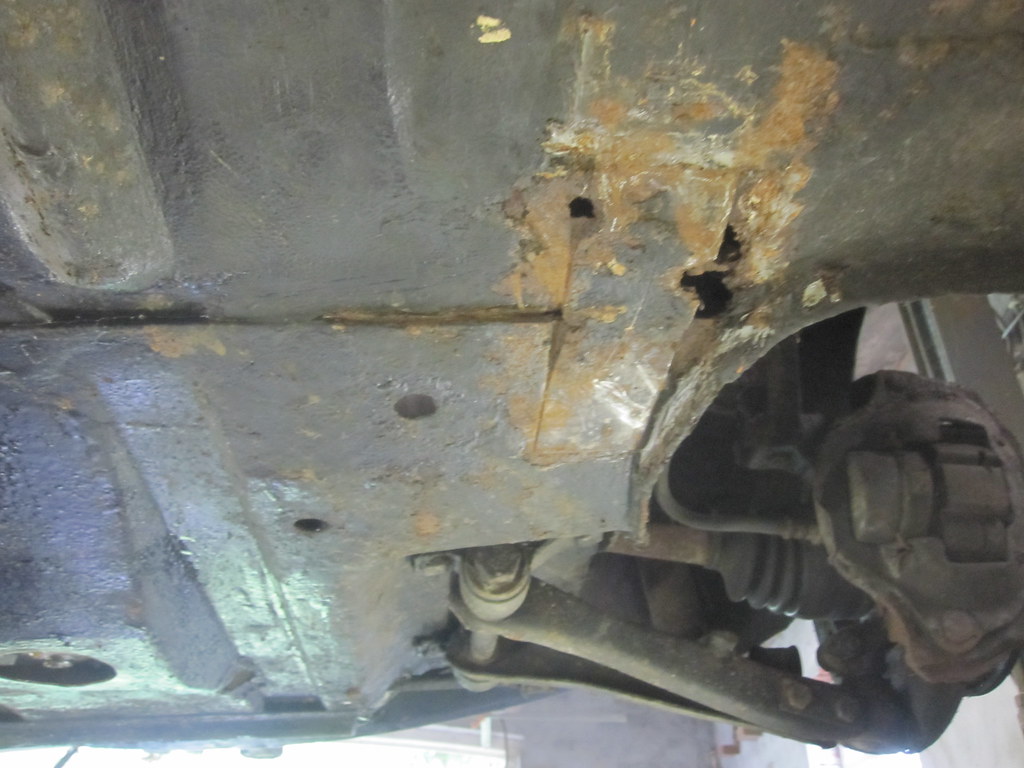
(The brown stuff you see on the floor inside the cabin in below photos is not rust but dried up Owatrol oil.)

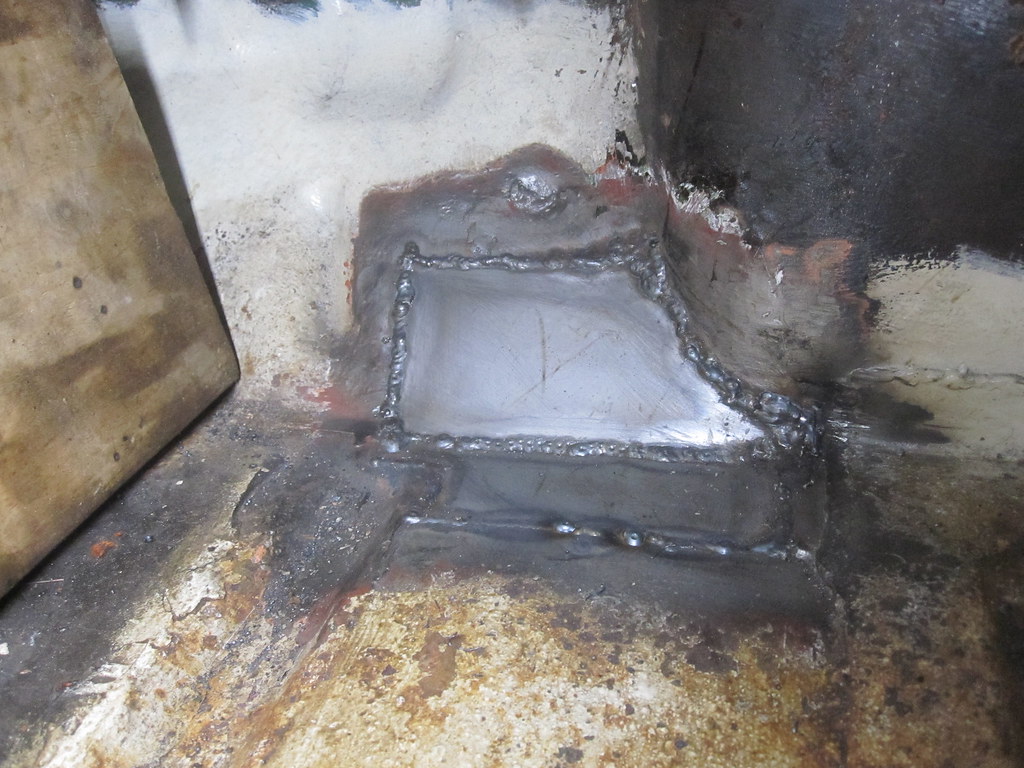
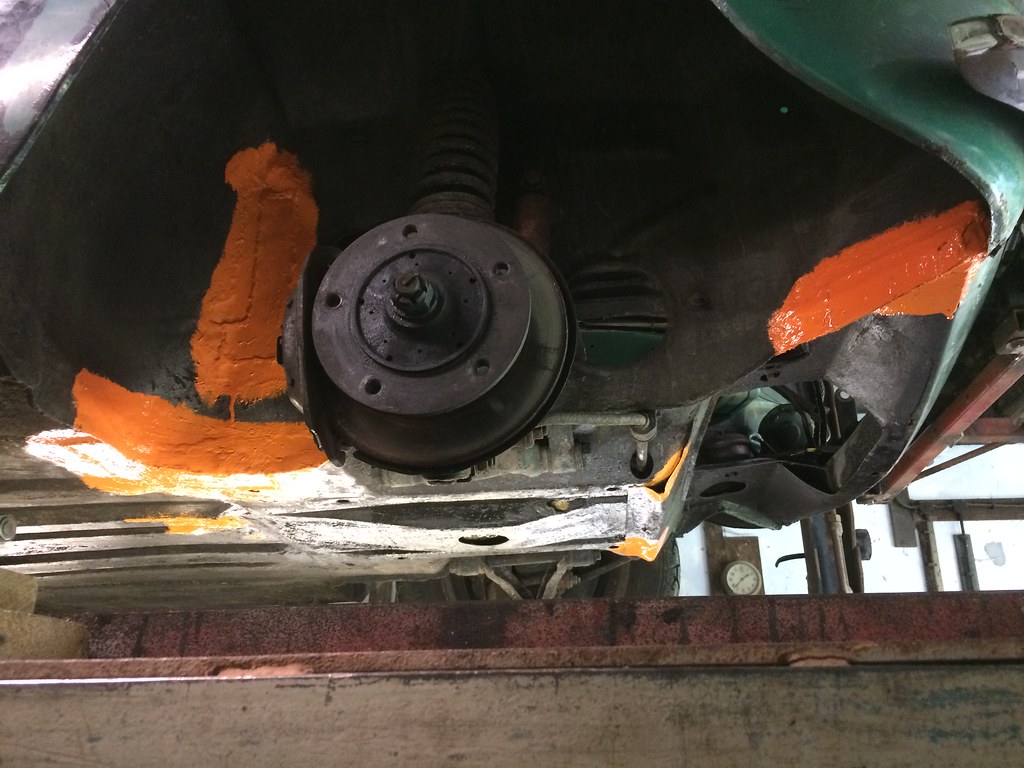
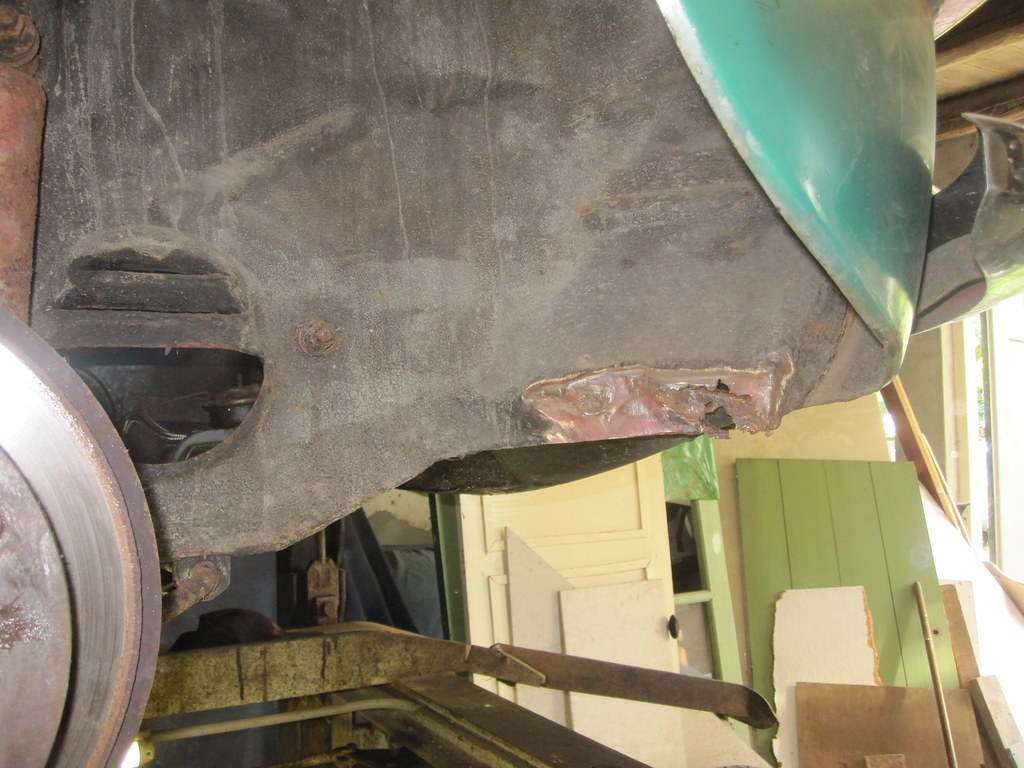
Note I notched the front jacking point both sides to give the exhaust 1cm more ground clearance:
There is some more welding to do in at least five spots, but this is not work a new MOT depends on.
Exhaust.
I finished the exhaust I started modifying last time. I ground down all welds and gave it a lick of paint. In hindsight I shouldn't have bothered, the paint burnt off instantly when I fired up the engine. So much for special high temperature paint... The exhaust sounds great though and the nasty vibration it had in certain rev ranges has completely vanished; apparently the flexible section and the two extra bobbins do the job.
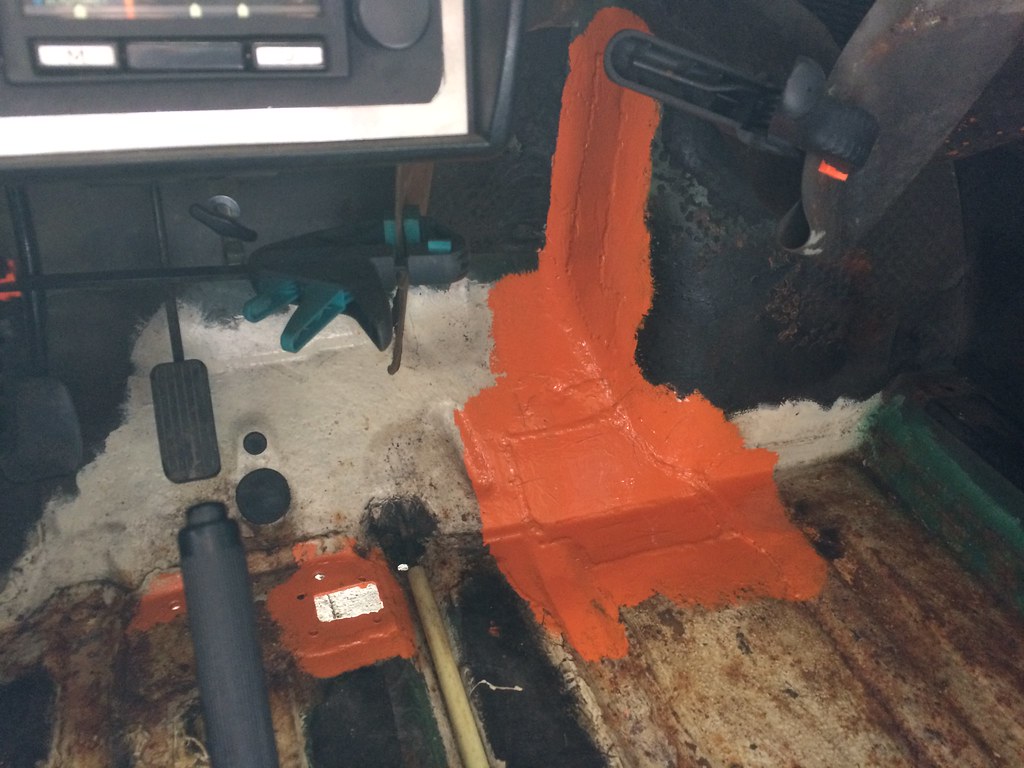
To make sure the lambda sender has enough room (it must be installed between 10 and 2 o'clock positions in the exhaust) and can be easily removed for calibration from inside the cabin I cut a hole in the floor. Because it is nice if the cabin stays free of road dirt and fumes I've made a lid with a cork gasket that bolts onto the floor and will be hidden by the carpet.

Really pleased with the modified exhaust tip, I've always disliked the showy Jetex design.
Clutch.
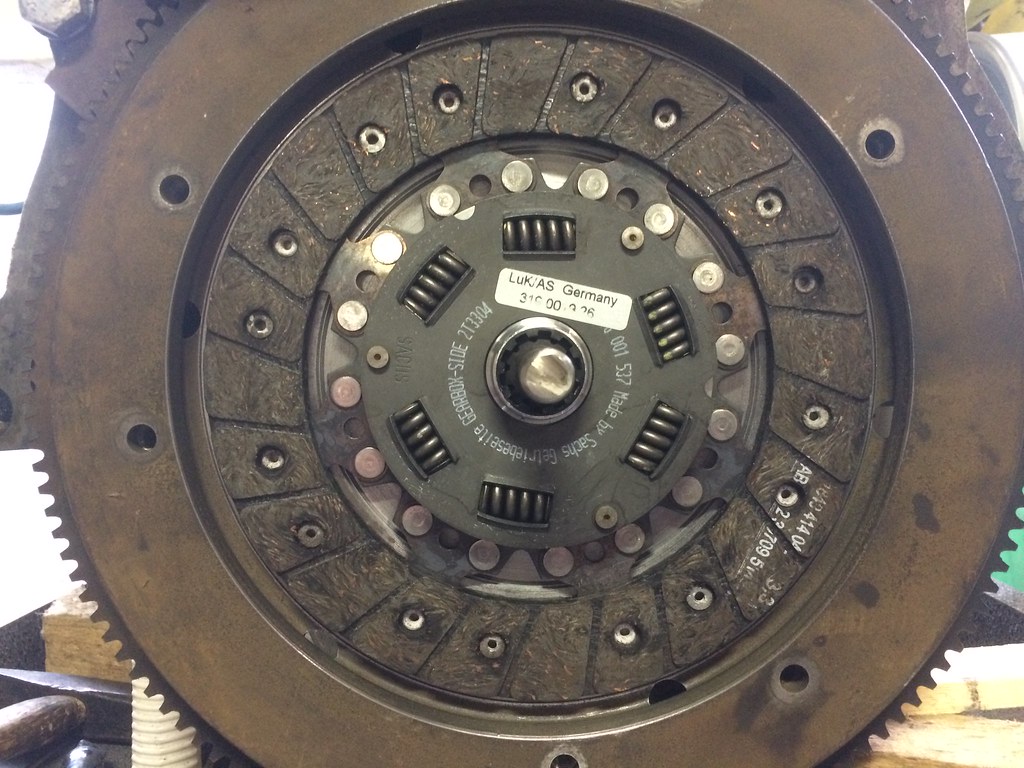
When installing the engine, I apparently grabbed the wrong clutch off the shelf so I had to pull the engine again. The plate was sticky and the springs in the clutch plate and cover were worn. Teaches me for keeping old parts...
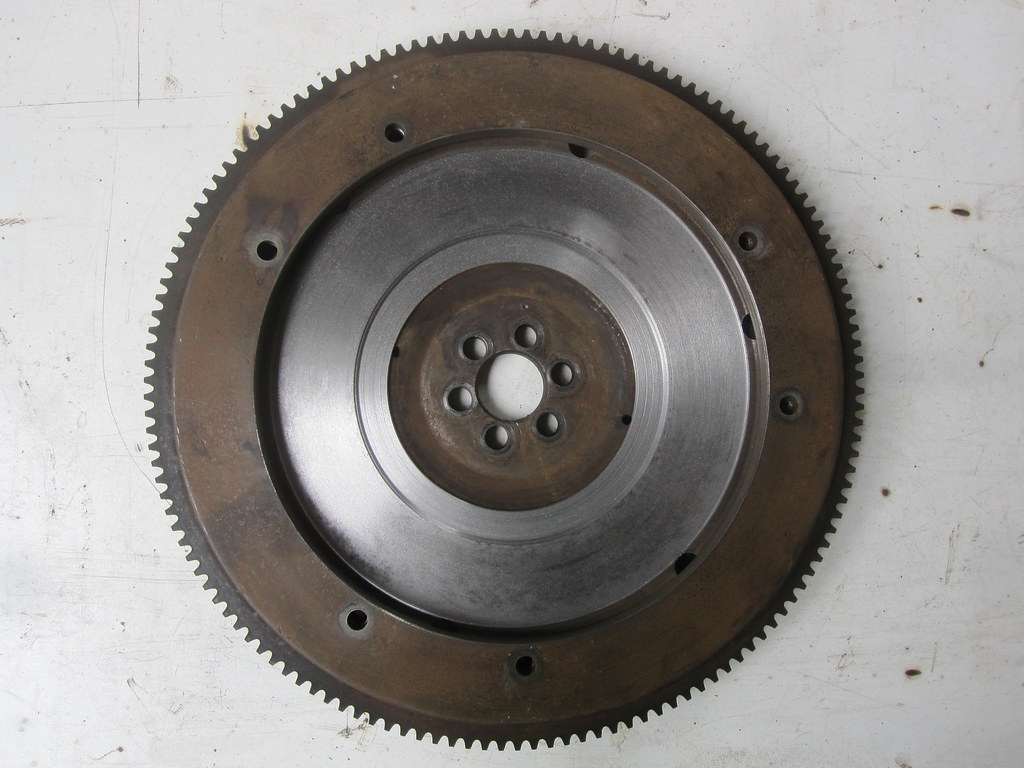
In 2007 I bought a complete LUK clutch kit that I never used bar a 10 mile test drive with an engine that didn't work very well. Glad I checked the plate before installing it, as it appeared to be one of the faulty ones that are still being sold and I keep warning people for, completely ignorant of the fact I owned one myself... Easily remedied on the lathe by cutting a 2mm relief in the flywheel to assure the rivets won't touch when the friction surface wears down. I also cleaned up the rest of the flywheel so it's all fresh again.
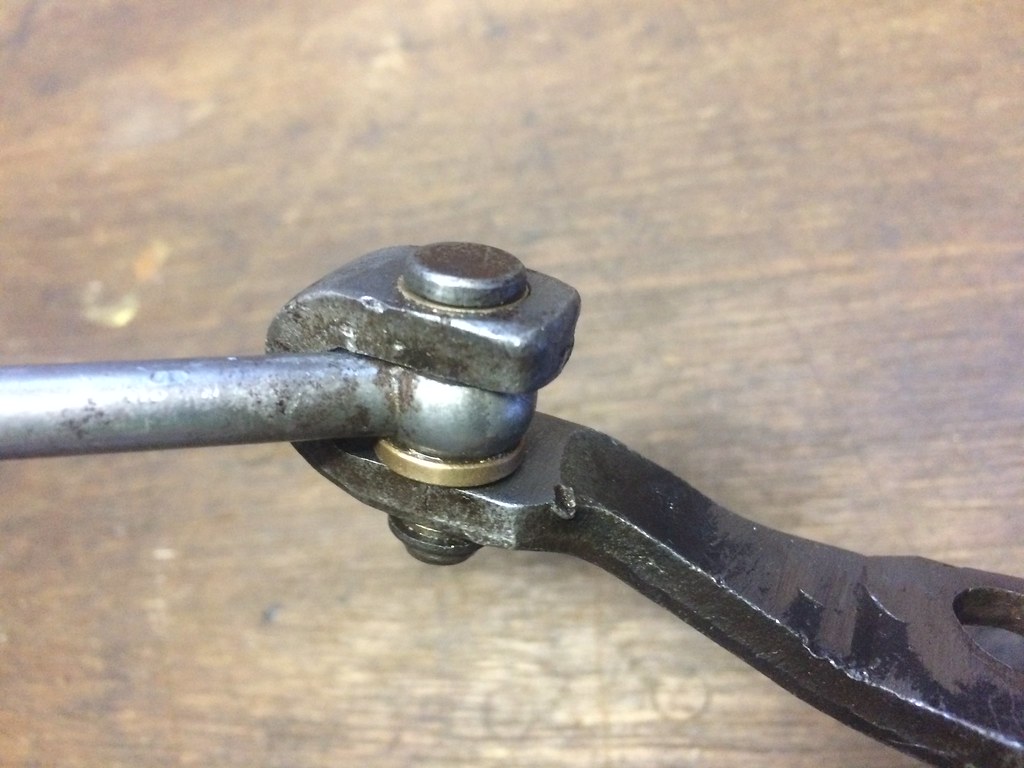
Since I had the engine out anyway, I took the chance to further minimise play in the clutch actuation system. In the past, I've already welded up the oblong holes in the clutch cylinder clevis and the pedal and in the release bearing arm. I've now drilled out, bushed and reamed to size the holes of the "hinge" in the rod that goes into the slave cylinder.
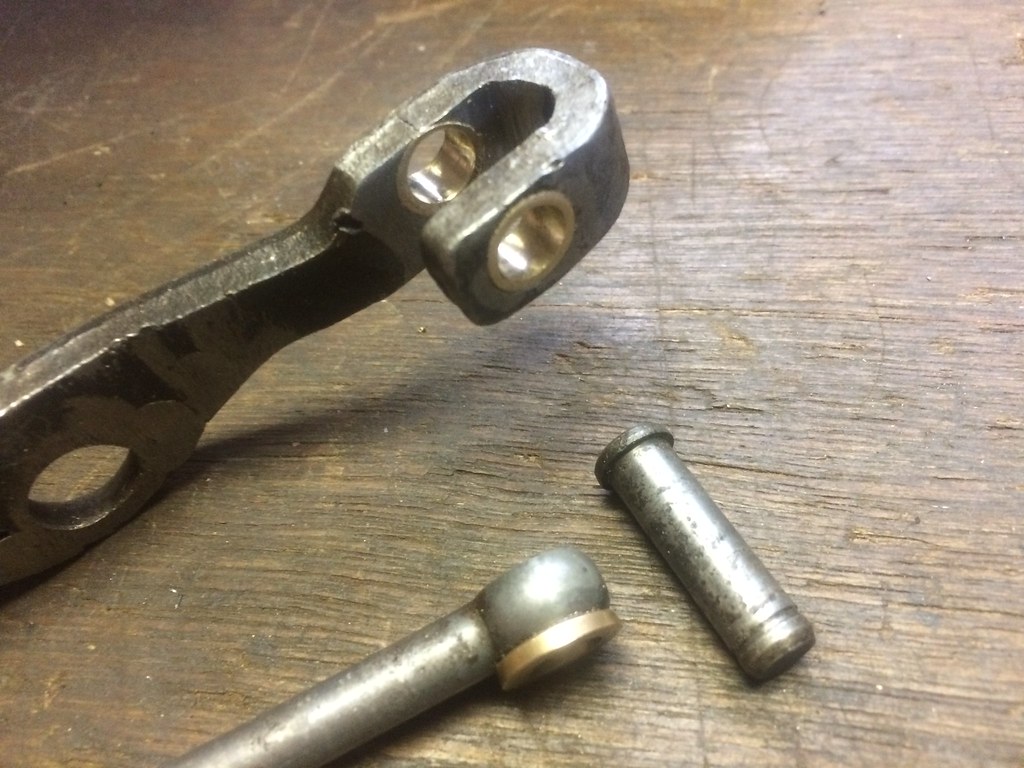
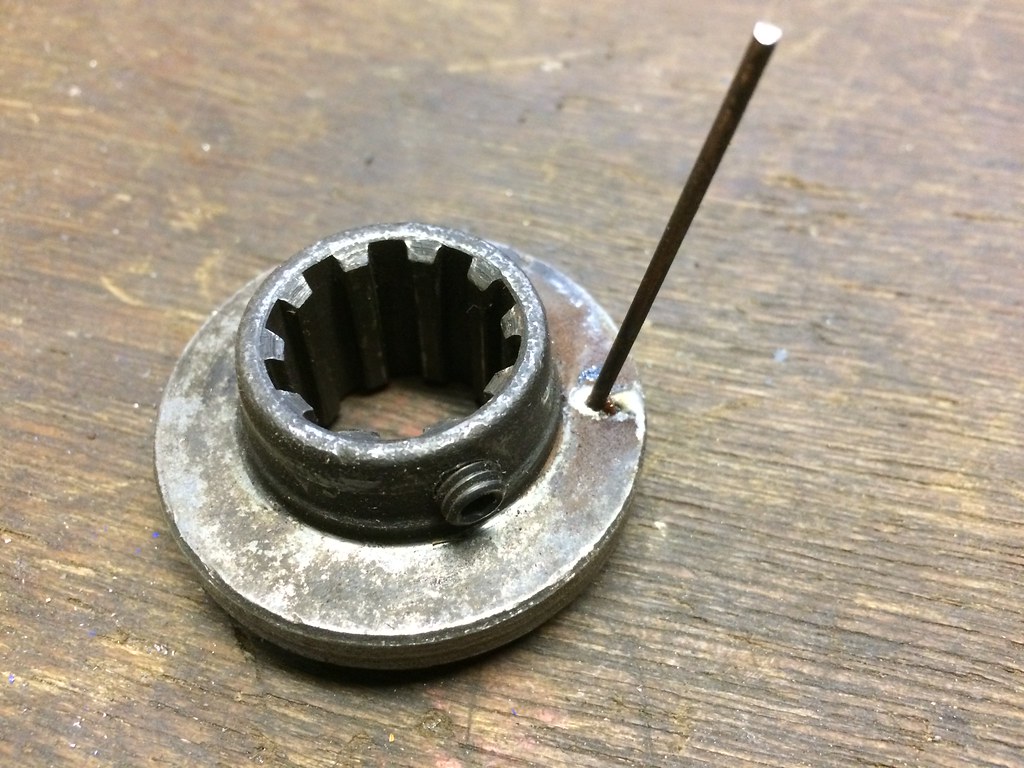
I found a new use for the centre of the faulty clutch plate; I turned it down on the lathe and soldered in a pin to create a gauge to check the position of the clutch release bearing (both radial and axial).
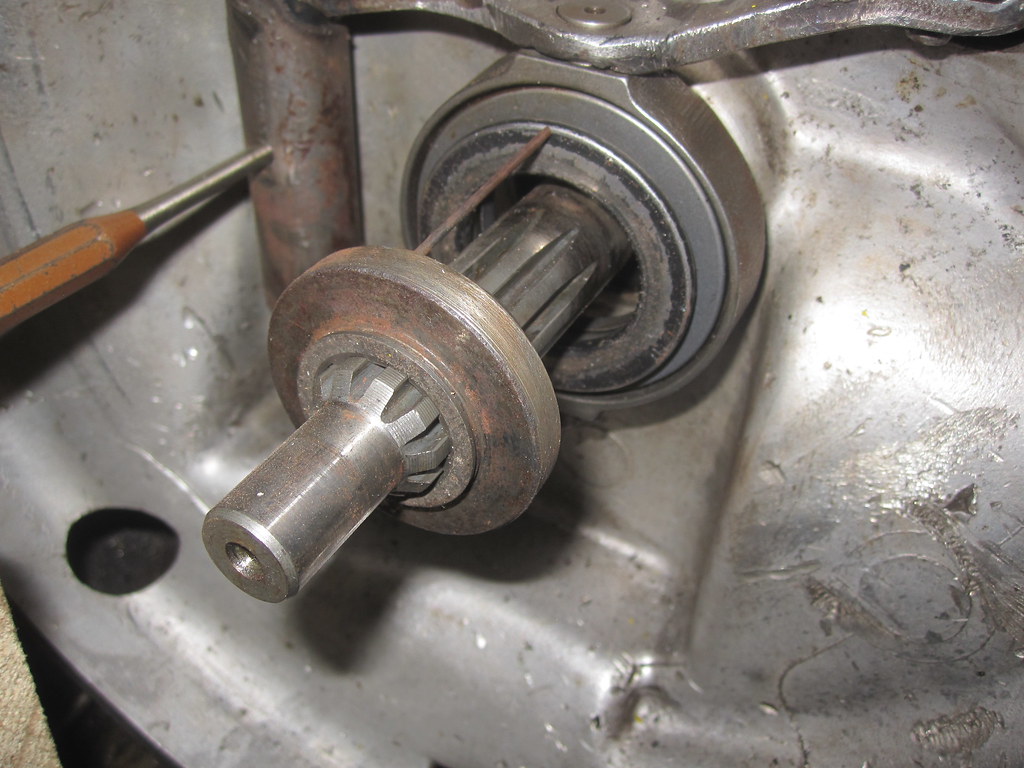
I found the bearing assy to sit parallel yet 3mm low, easily remedied with some filing and a copper washer:
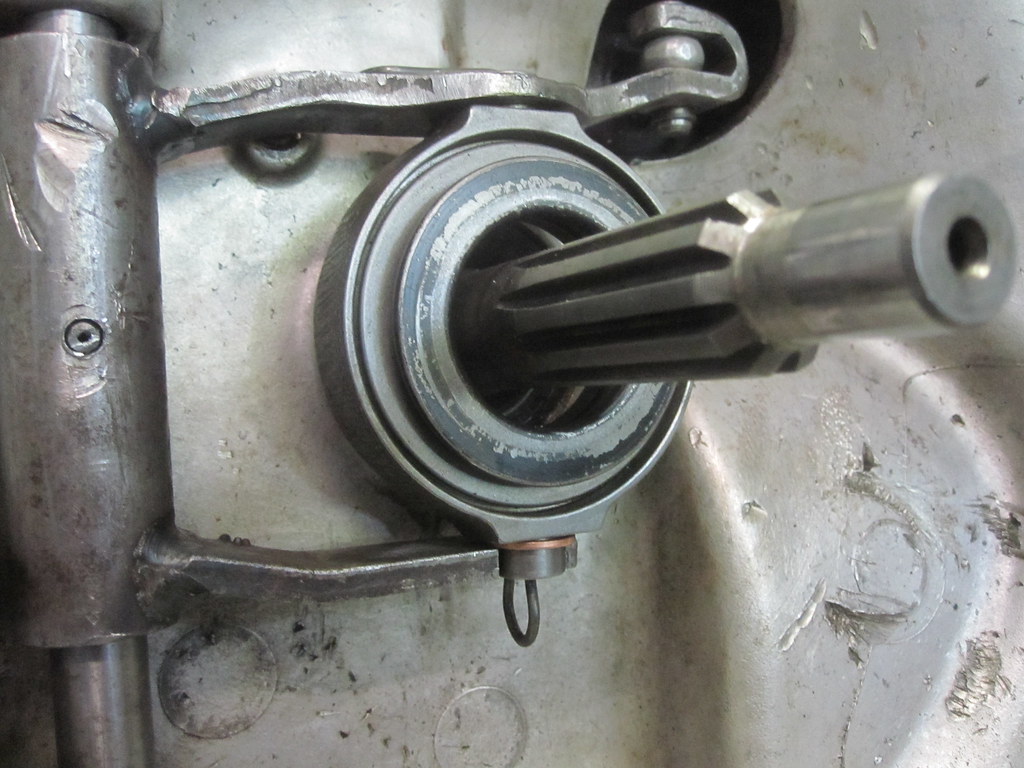
Clutch judder now completely gone.
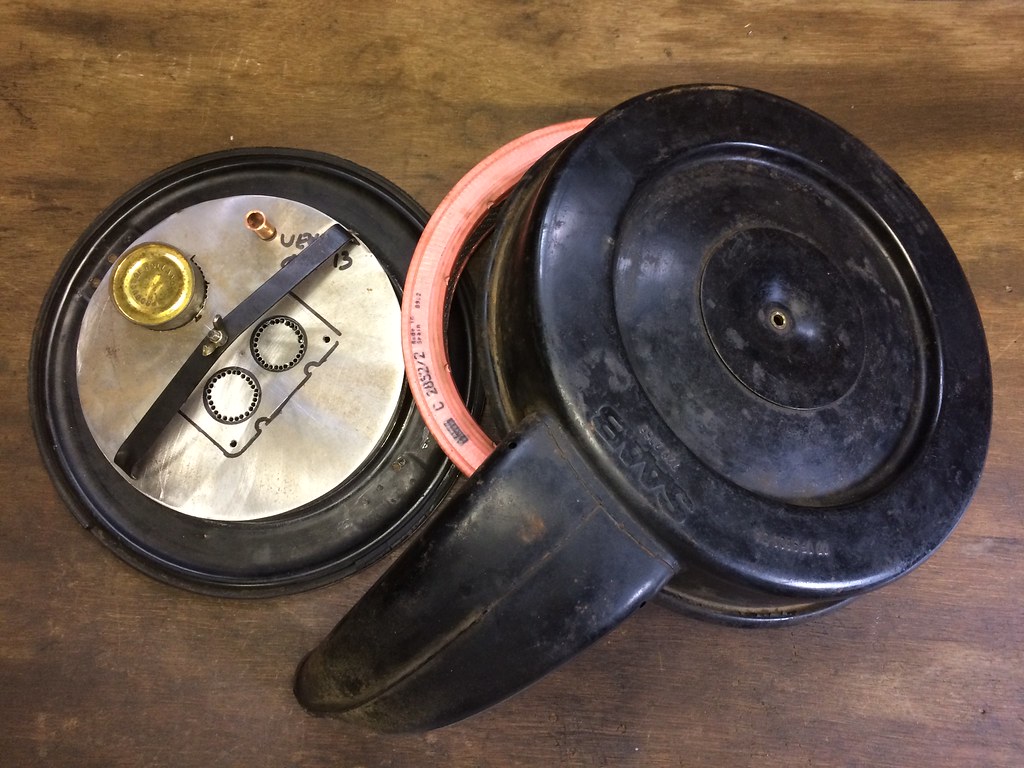
Carb/ air filter
I've jetted the carb to Cortina GT spec to create a baseline for tuning. Changed the mains to 150 and 165 just to be safe and avoid the risk of breaking stuff due to lean mixture before I get to properly tuning the carb. I have an array of spare chokes, jets and emulsion tubes to experiment with, perhaps on a rolling road at some point.
When I installed the engine, I mounted the chrome pancake filter I got with the DCD. I dislike mesh/ wire "sports" air filters for their looks, lack of effectiveness and the terrible intake noise. My 96 is not a "sports" car, I want the filter to catch small particles (that's what filters are for!) and the car is noisy enough already, hence my preference for paper or cotton filters. Since the DCD is a fairly high carb, the Solex 32TDID filter housing I want to use needs a good chop. I started modifying it by cutting off its original carb adaptor and making a new bottom plate. Under the plate is a ring that raises the bottom by about 15mm and the round tin raises the bottom above the carb's fuel filter a further 15mm to ensure everything clears. I didn't get around to finishing it, more pics when I get to it.
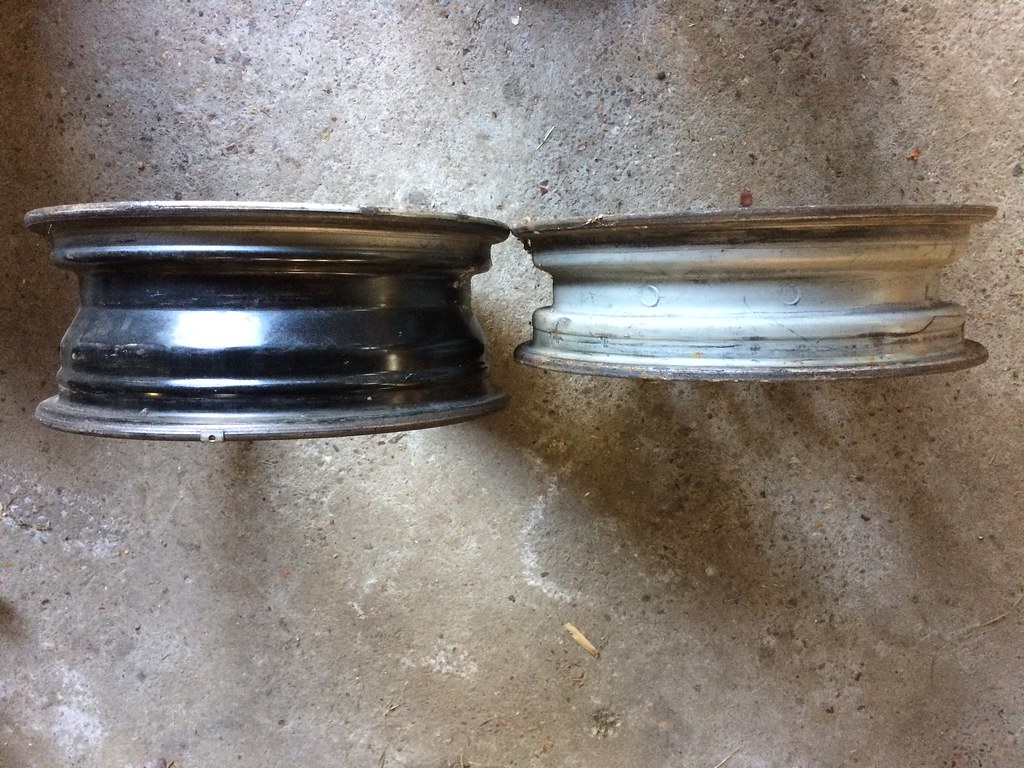
Wheels
I've been wanting to widen a set of wheels for years. Ages ago in Denmark I sourced a set of 5.5J C900 wheels of which I want to use the barrels with 5-stud V4 centres (which have the same diameter as C900 centres).
I made a start on this little project by cutting out the centre of a 900 wheel, unfortunately I didn't get around to liberating a V4 centre this time. I'll drill out the spot welds and fit the centre to the 900 barrel when time allows.
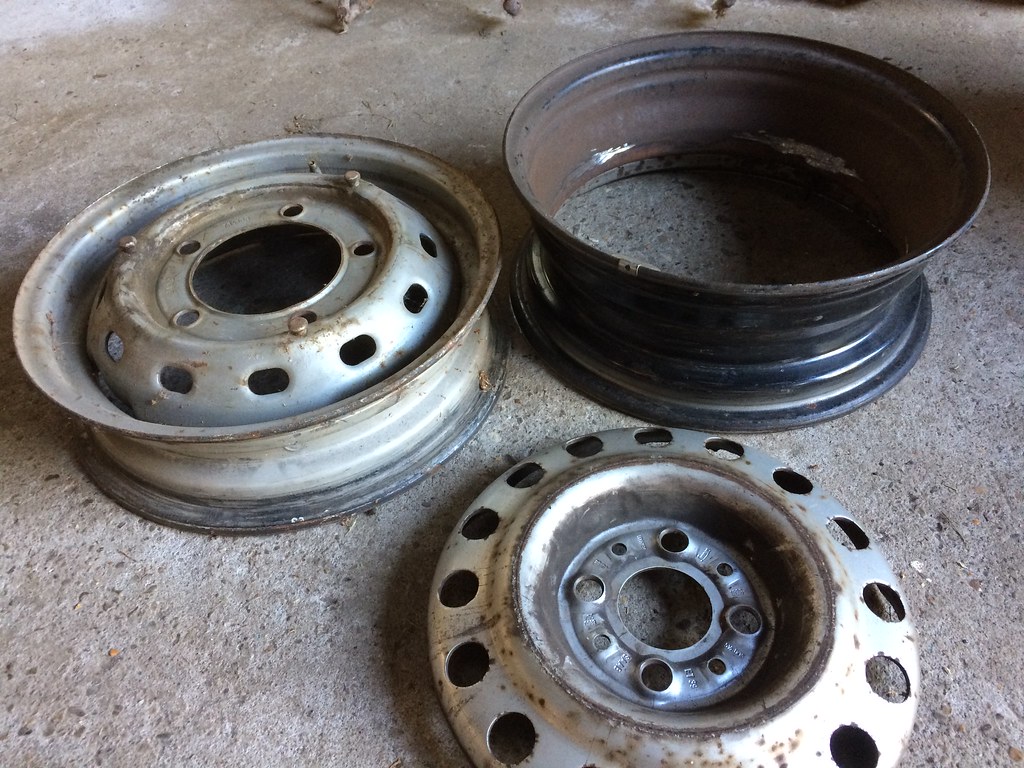

There are two options for fitting the V4 centres to the 900 barrels. Both the 900 and 96 wheels are ET39, If I simply replace the 900 centres with the V4 ones, the ET will stay the same and the wheels will be widened 3/4" on both the inside and the outside. The other option is flipping the barrels/ mounting the centres the other way around, this will widen the wheels by 1.5" to the outside only. I'll have to see what works best in terms of arch clearance, but I think everybody will appreciate the latter option offers the best visual result as it gives the most "dish". I'm not too worried about the lower ET this will result in. If I flip the barrels I'll have to weld up the holes for the valves and drill new ones on the other side.
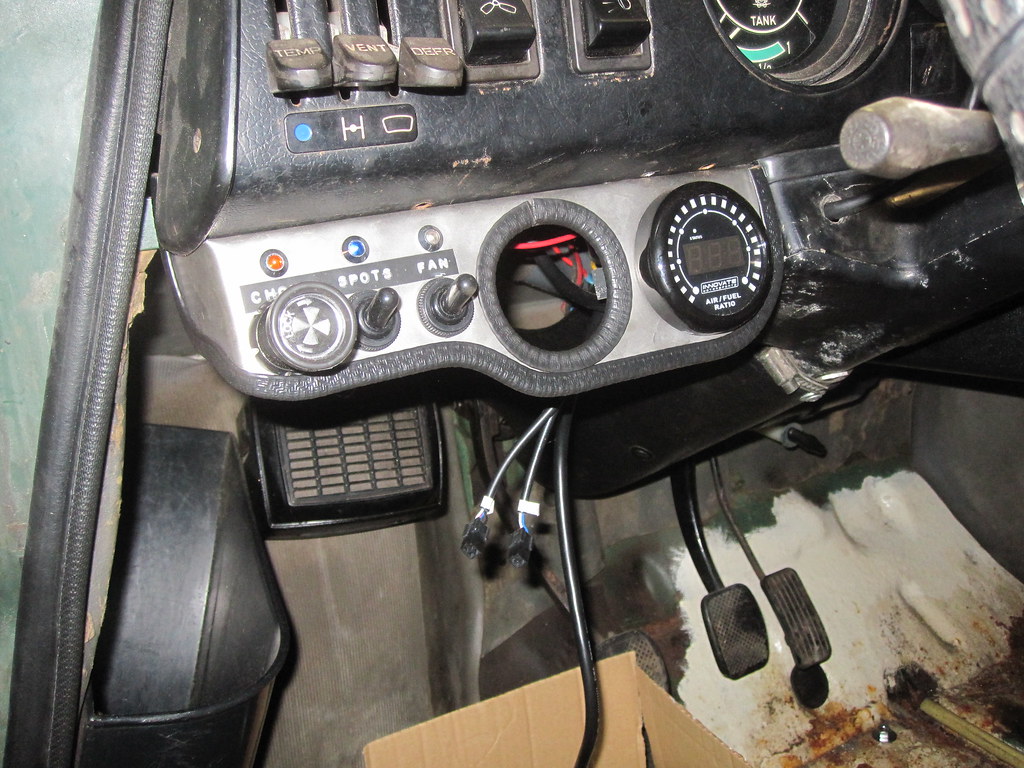
Aux gauge/ switch panel
Last time I forgot to take a pic of the small stainless auxiliary dash panel I made. The hole between the switches and the AFR gauge is reserved for an oil pressure gauge, but I have yet to find a nice one plus a sender. If you happen to have a spare you want to let go let me know!
Just before I had to head home to the UK I took the car for a wee spin. It was great driving it again after it has effectively been off the road for about a year and a half. The new engine pulls great, the modified exhaust sounds excellent, the clutch judder is completely gone and the gear change is as smooth as it gets on a V4 gearbox after adjusting the steering column. All in all I'm quite pleased with the progress. Hope this was all for the foreseeable future and it passes the MOT as I'd rather spend my limited workshop time on the 95 and drive the 96 as it is now. We plan on taking the 96 to the Ardennes and the Vosges in August for a good shakedown of the "new" engine; the AFR gauge should me help tune the DCD as we go.
www.saabv4.com |
Edited by - melle on 08 Sep 2017 22:00:34 | |
|
RhysN
V4 Fanatic

United Kingdom
411 Posts | Posted - 01 Jul 2017 : 20:21:24
| | Really helpful thread Melle. | |
|
melle
V4 Guru
United Kingdom
3833 Posts | Posted - 01 Jul 2017 : 23:13:46
| Good to hear you find my ramblings helpful, hope your 96 has less rust to start with!
www.saabv4.com | |
|
Wonky door
V4 Beginner

United Kingdom
96 Posts | Posted - 04 Jul 2017 : 18:12:00
| | I always enjoy this thread Melle,your exhaust ideas came in useful for the van. Love the idea of wider wheels banded or 900. Do the centres take much removing? Hope the van will be finished soon. | |
|
| Topic | |
