Note: You must be registered in order to post a reply.
To register, click here. Registration is FREE!
| T O P I C R E V I E W | | Doive | Posted - 13 Apr 2021 : 17:32:55
A project thread for our 1973 95 V4. It's been having a lot of works over the last 18 months, including an engine rebuild, full brake overhaul, and a great deal of welding. Some may have seen updates on the UK Saabs thread, but I'll post them again here.

1970 95 V4 van
1972 Sonett 3
1973 95 V4 estate | | 15 L A T E S T R E P L I E S (Newest First) | | melle | Posted - 14 Apr 2021 : 11:40:33
Wow, youve been busy! I know most of it was done a while ago, but a few things if I may:
Ive never seen a water pump pulley shear off, that bearing must have been baaaad! Not sure if youve kept that pump backplate, but in my opinion its in pretty poor condition with the amount of cavitation damage it has.
I think a vacuum gauge is much more useful than an oil temp gauge as it helps you diagnose engine issues like worn/ burnt valves, HG leaks and vac leaks on the go. Not sure what oil temp tells you?
I think 30psi/ 2 bar oil pressure is pretty poor for a freshly rebuilt engine and I would certainly investigate whats going on. It may just be the cheap gauge, are you sure youre using a matching sender? Did you replace the balance shaft bearings? Did you check the pump internals or replace it? Or are you using really thin oil?
Is the van next in line? That will be even more useful! 
www.saabv4.com | | Doive | Posted - 14 Apr 2021 : 10:12:36
Braved the cold north wind over the Easter weekend to try and get the 95 bodywork finished and back on it's wheels. Cutting out and dealing with the nearside rear sill rust, this seems to be an area where the 95 is prone to rotting out, I've seen it on several cars, and ours has gone on both sides. I repaired the driver's side back in 2017.
Cut out the rot and welded in a new inner sill section.
 
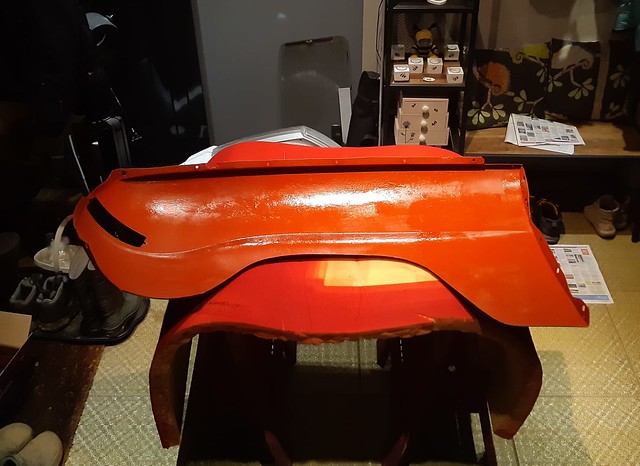
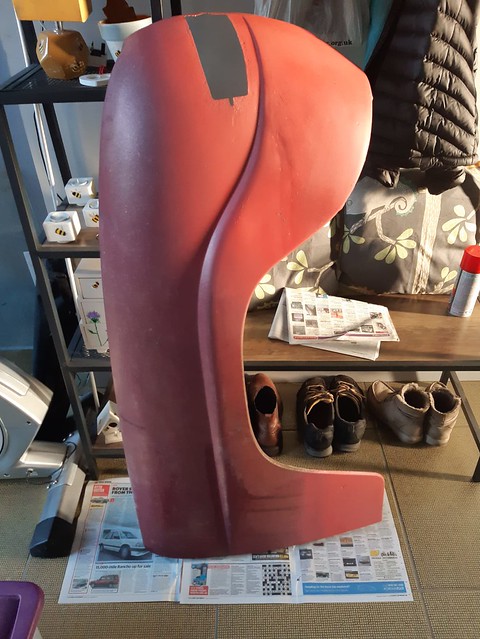
Formed and welded in the new outer wing closing panel. Painted it with this lovely colour matched Cromadex paint, which was bought for our Austin K2 lorry, but didn't match that at all. So a gallon of it to use on other projects... the 95 is like a Picasso painting anyway, so I don't think a further colour will detract too much from it.
 
Applied several coats of Dinitrol UB brushable wax underneath the car. Good stuff that has favourable reviews, so will hopefully keep the rust at bay longer term.
 
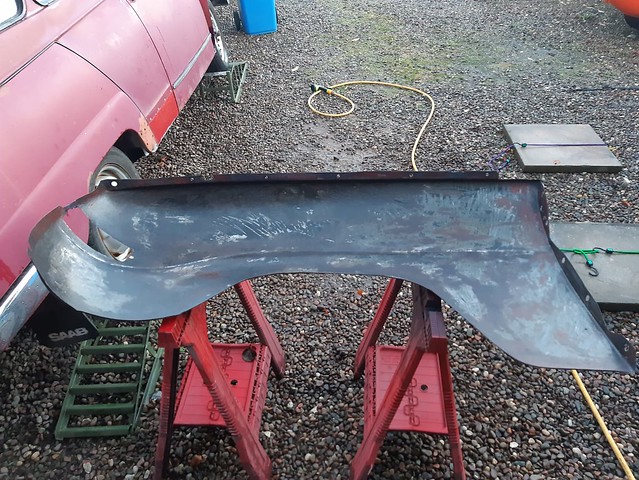
Gave the wing and inner wing similar treatment - a spray coat of zinc primer, thick coat of Electrox zinc paint, thick coat of Cromadex, and finally two coats of Dinitrol UB. When it is refitted to the car I'll coat the seams with Dinitrol S-50 spray wax, which creeps into crevices.
Finally the floorpan was treated as per the inner wing, but I'll give the inside two coats of Dinitrol UC clear wax - it should be almost invisible once treated.
The car hasn't ran since just before Christmas, so put 10 litres of fuel in the tank, put the jump pack on the battery, and with a bit of choke it fired right up. Oil pressure 50psi cold, good steady idle. Jobs left to do are refit the passenger wing, and adjust the handbrake. There is a little rust in the boot floor around the bungs, so all that was ground back and treated. In the fullness of time those will get cut out and replaced, but for now the car is structurally sound, and I'm happy.
1970 95 V4 van
1972 Sonett 3
1973 95 V4 estate | | Doive | Posted - 14 Apr 2021 : 10:09:01
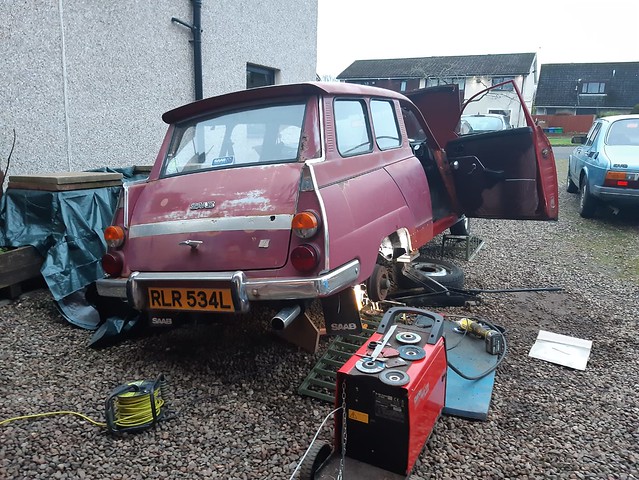
The 95 V4 has been my ongoing winter project since I spotted some extensive rust in the offside rear quarter sill and floorpan.. Since then I've replaced all that rot, moved on to the driver's floorpan and front of the sill, repaired, painted and rust proofed it all. Now I'm moving on to the nearside to see how bad that is. I knew there was a big hole in the front floorpan around where the bung used to live, underneath the floor mat. The MoT tester was never too worried about it, as it was outwith the suspension zone. Another area of concern was the rear quarter bottom, where the outer wing meets outer and inner sills. On the offside previously I had the same rot, and ended up cutting out and welding in new metal.
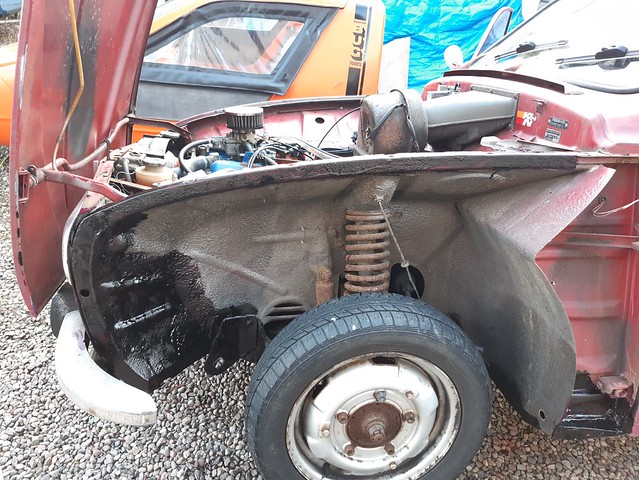
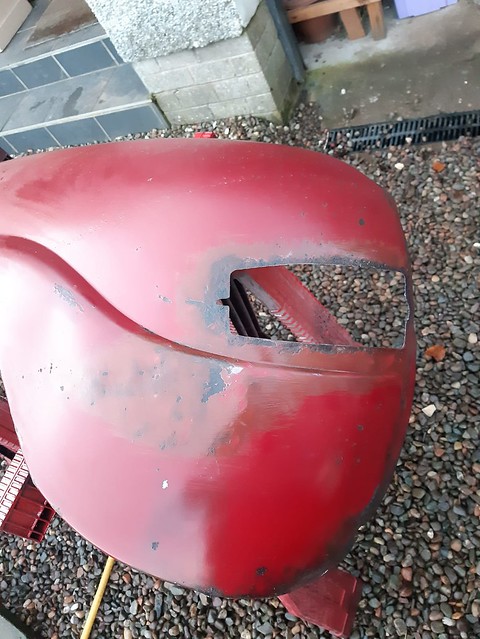
Started on this side by pulling off the front wing. The car has had a few bumps and scrapes over the years, with the bumper pushed right back against the wing, so some judicious use of a pry bar, a lump hammer, and blocks of wood pulled that out straight to get the wing off. Grinding it all back with the knotted wheel revealed the same problems as the offside wing, so a coat of Rustbuster123 on to treat the remaining surface corrosion.

The inner wing on this side looks very good, with only a little peeling of the underseal to reveal surface rust only. Sadly the wing top rail has a small hole, but I'll weld that up.
 
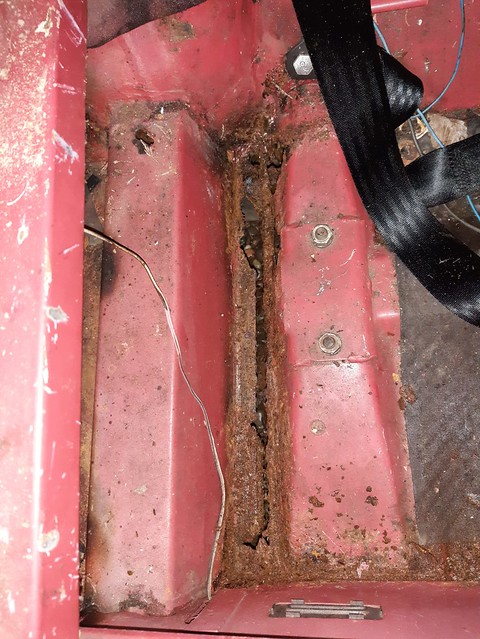
The floorpan shows the expected surface corrosion, but thankfully after hitting the topside with the knotted wheel, and scraping the underseal off the underside, it's generally solid. Treated again with the rustbuster, and cut the rotted part out of the very front. Should be a simple enough patch repair.

Moving backwards, the seatbelt mount didn't show any obvious signs of distress or corrosion. Someone has been in this area before, as there is evidence of welding all along the outer floorpan edge. Pleased to report it fits in nicely with my standard of repairs - that is ugly but solid 8) removed the seatbelt lower mount and attacked the floor with the knotted wheel - it disappeared in a frisson of dust and sparks. No big deal, I'd rather find the rot and deal with it all now. Note the welding to the right of and below the mounting.

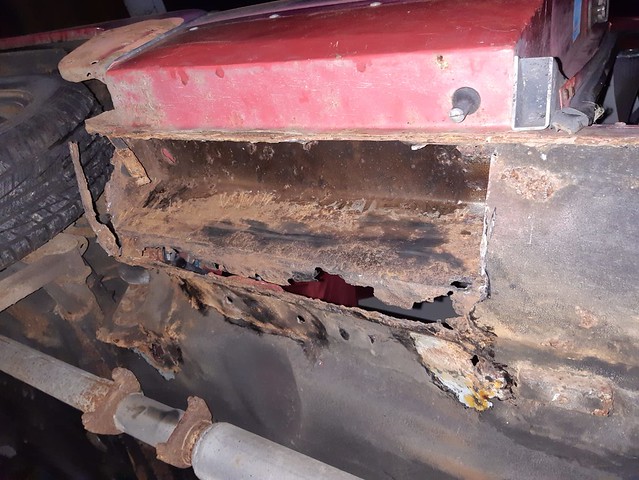
On then to the rear quarter. I knew repairs would be needed here from the way the seam had blown between the three skins of metal. Removing the little plastic rain gutter from the bottom of the door seal lip, the metal appeared thin and distorted as I tried to unscrew the plastic - not a good sign. It soon vanished when interrogated with the grinder. The surface rust on the sill received the same treatment, however the 'surface' rust on the quarter panel disappeared, taking the corner of the panel with it. I knew there was rust here, I've been ignoring it since last autumn - I should point out for clarity the car has been off the road since last August, I wouldn't knowingly drive it in this condition. Moving along the outer sill revealed more of the same.
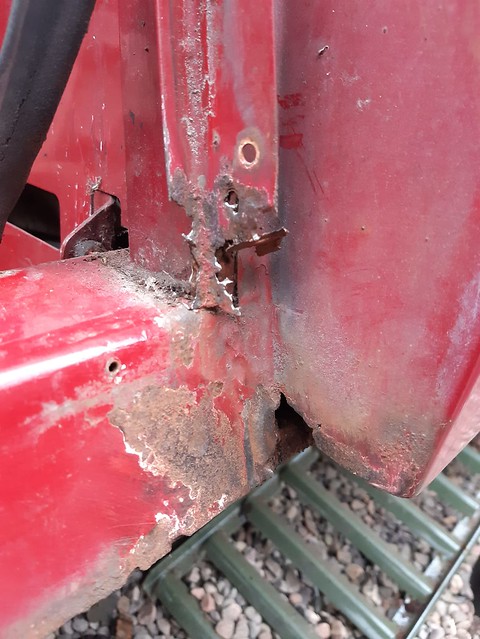 
Once the grinder had done it's worst, I went back in with an inquisitive chisel, to find out how far it had spread. The inner sill crunching and disappearing in the void suggested it's exactly the same as the other side was back in 2017. Ah well, I know what's involved, just need some dry weather to get on with it. Thankfully the jacking points are solid on this side front and back, so that's good news.
1970 95 V4 van
1972 Sonett 3
1973 95 V4 estate | | Doive | Posted - 14 Apr 2021 : 10:06:27
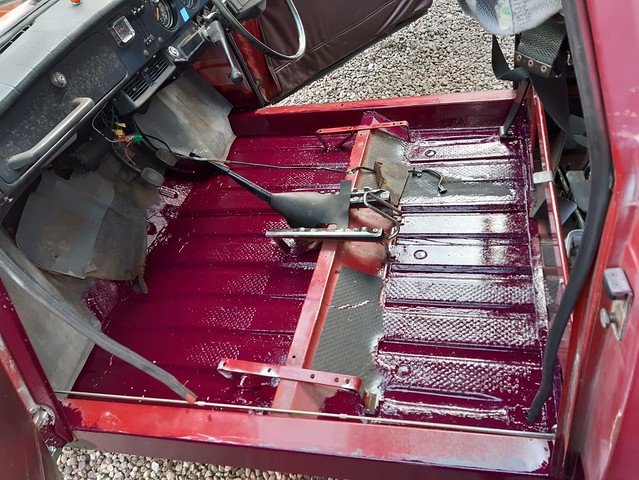
One side of the 95 V4 now complete, car is back on it's wheels to give access to the garage to get the Fox out. Plan going forward is to get on to the passenger side to tidy it up - hopefully(!) there will be less work on that side than there has been on the driver side.
The completed floorpan was treated inside and out to a coat of zinc galvanising etch primer, then Electrox zinc primer, then red oxide primer, then the outside received a coat of Cromadex coach paint, and finally two coats of Bilt Hamber underbody wax, while the inside received two coats of clear Dynax wax. If this starts rusting again I'll be very disappointed. The rear floor received the same, except I used the dark wax instead of the clear.
 
Our neighbours really love us... car still looks scruffy from above, but is now pleasingly solid underneath.
1970 95 V4 van
1972 Sonett 3
1973 95 V4 estate | | Doive | Posted - 14 Apr 2021 : 10:03:20
Tidied up the driver's wing over the weekend. The front end of this had been brush painted in primer by someone years ago, and rust was starting to show through from behind the light. The bottom of the wing I had roughly spray painted back in 2017 in an attempt to offer slight protection against the dreaded corrosion.
Inside the wing was covered in a mixture of dirt, loose underseal, and surface rust. Cleaned both the outside and inside up, and applied a coat of Rustbuster FE123 converter all over. Once this had gone off, sprayed a coat of zinc galvanising spray, followed by a coat of Electrox zinc paint, followed by a coat of red oxide primer. Eventually it will get a coat of Dynax underbody sealant.
The outside of the wing received several coats of zinc galvanising spray, followed by several coats of red high build primer. Rummaging through my aerosol drawer, I could have sworn I had a tin of Toreador Red 'in stock', as I had used it back in 2017 on the outer offside sill repair. I couldn't find it, so the closest I had to hand was Cherry Red from our 900. Typically enough this ran out after two passes across the panel, so as a last resort I had to dig out the Henna Red I still had from my first Chevette - that car was scrapped in 2009, and I bought these tins on ebay when I still lived in my flat in Edinburgh, so they are at least 15 years old. Henna Red is more of a red oxide orange colour, but given that this car looks like something from the Sergeant Pepper album cover, I don't think an exact colour match is going to be much of a concern.
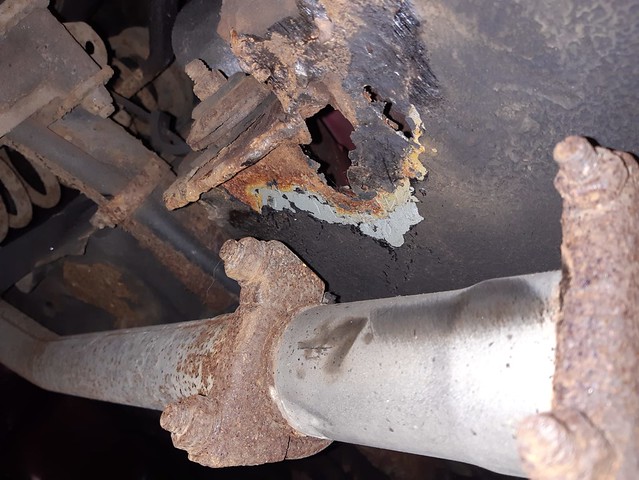
Moving on to the floorpan, ground it all back to find lots of frilly metal under the driver's heelboard. No surprise as the windscreen and door seals leak, so when it rains the floors are covered in water. Have ordered new door seals to hopefully cure this. The old bitumen underseal on the floorpans came away in great sheets, to reveal largely pristine factory finish across most of the underside, so that was a very pleasant surprise - obviously good stuff. Will replace it with the Dynax sealant, it has a very good reputation for longevity. Investigated in around the fuel line with a delicate chisel, to see if the floorpan was soft, and ended up puncturing through in two places...

1970 95 V4 van
1972 Sonett 3
1973 95 V4 estate | | Doive | Posted - 14 Apr 2021 : 09:59:07
Finished the welding on the rear section of floorpan and sill on the 95 V4 - a few scruffy little patches but solid enough. Once painted and undersealed on the outside it should look presentable enough. Planning to fill the sills with Dynax S50 cavity wax as well once welding all complete, so should hopefully last a long time. Jacking point cleaned up nicely and was welded back on.
 
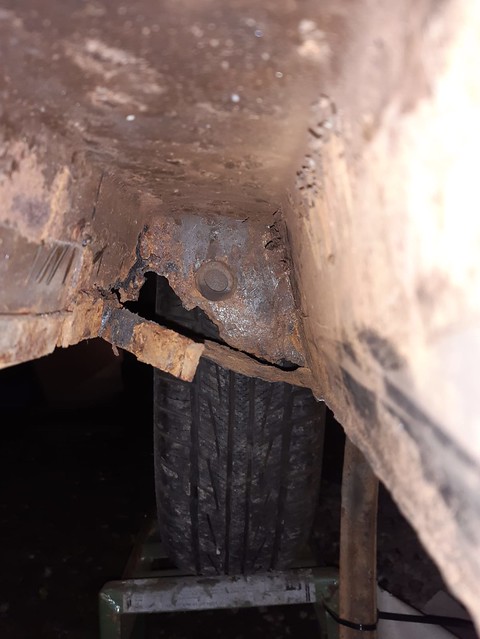
While underneath the front offside measuring the distance between the jacking points, I noticed a small brown scab up behind the rear edge of the front wing. Poking with my finger quickly turned it into this hole. Hmmm. Still, better to find these things now. Removed the screws inside the door aperture to release the trailing edge of the wing to give access, but then removed the upper screws to give more access, then investigated how it was held on at the front - amazingly the wing was off in under ten minutes, without disturbing any other panels. Excellent engineering. Means I can clean and treat the inner arch as well. Of course rust creeps, so ended up removing quite a chunk of inner sill, lower sill and inner wing. Also punctured a little hole above the centre of the jacking point with the 'inspection' chisel.
 

Welded in the small section of splash guard first, then the lower section of the outer sill. Cleaned up and rust treated the sill above the jacking point, then formed a patch to fit over the whole rear of the jacking point from inside the sill, and welded it from above and below. The jacking points like to go soft in these locations, so hopefully strengthened this one now and won't need to go back to it any time soon. Formed a folded closing panel for the inner sill into the driver's footwell, then finally formed the panel for the inner wing closing, during the welding of which the welder ran out of wire. Typical! Plenty of zinc galvanising spray everywhere, followed by a thick coat of Electrox zinc rich primer. Next I'll clean up the inner arch and give it a couple of coats of paint & rustproofing, then get the wing back on.
 
I'd like to give it all a couple of coats of hammerite or similar, although we do have a gallon tin of Cromadex coach enamel that was purchased to paint the tailboard of our Austin K2. Unfortunately it quickly became clear that this was not a good colour match, and so a further batch was sourced, meaning this plum coloured paint is now spare. However, the original Toreador Red paint on the 95 has faded and discoloured to such an extent that it almost appears plum coloured, so it might not be such a bad match. I don't want to go painting too much of the original patina, as that remains part of the charm of the car.
1970 95 V4 van
1972 Sonett 3
1973 95 V4 estate | | Doive | Posted - 14 Apr 2021 : 09:56:25
Well these turned out to be Famous Last Words... the more I cut, the more car that disappears. In fairness the 95 has served us well for five years with minimal welding, and coming up to 47 years old it's only fair to expect a few bits of rust appearing. This one stayed particularly well hidden though, disappointed not to have spotted it sooner. Obviously couldn't use the jacking point to get the car in the air, so drove it up two ramps on the offside, then jacked the front up and turned the ramp round to give me unhindered access to the underside. Safe & secure, and shouldn't be applying too much unusual loading on the weakened structure.
The first pass with the knotted wheel and grinder - I cut the outer sill out completely up to the B-pillar, to get access and assess the condition of the inner sill and floorpan. The back end of the closing panel disappeared in a shower of rust particles and underseal - shows how well underseal hides corrosion... upper sections of the sill looked sound enough, and a patch I let in from the outside in 2017 is clean and rust free.
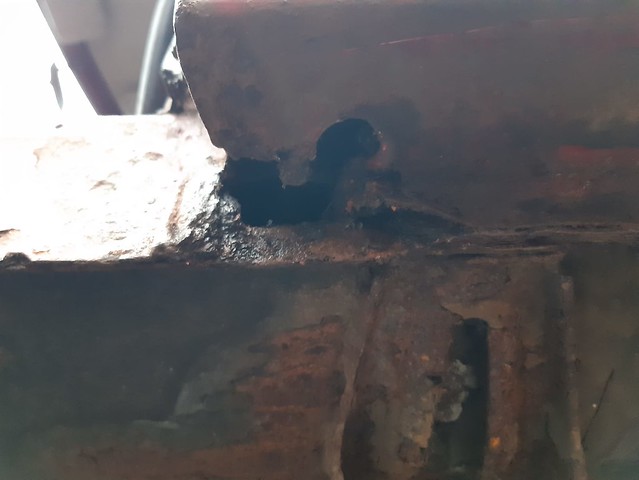
Thankfull the trailing arm mount is solid, just a little light surface rust. Obligatory inaccessible rust above the exhaust into the box in front of the rear axle. Plus the rear end of the sill had rusted right through the inner, middle, and outer panels. Nasty.
Made a start on cutting out, had to extend the outer sill removal beyond the B-pillar, to deal with some further rot in the floorpan in front of this. Managed to cut out above the exhaust by releasing the clamps & carefully levering the pipe sideways on it's hangers.
 
Finally started cutting and welding in patches. Felt like it took ages to get to this point, and it took me all afternoon to do five patches... the back of the sill was the most awkward, it had rusted right up behind the outer wing bottom, so some blind welding resulted. Also I had no reference for what the back end of the middle sill was meant to look like, where it butts up to, and where the flanges are, so I had a guess at what seemed sensible.
  
These dark evenings and inclement weather don't help in getting this done...
1970 95 V4 van
1972 Sonett 3
1973 95 V4 estate | | Doive | Posted - 14 Apr 2021 : 09:16:19
*From October 2020*
The 95 V4 has revealed this little bit of corrosion hidden in plain sight under the rear seat base, so that will need attended to before it sees the road again. Right through the floorpan and down beside the rear offside jacking point. Hopefully not too involved a repair.
1970 95 V4 van
1972 Sonett 3
1973 95 V4 estate | | Doive | Posted - 14 Apr 2021 : 09:10:22
One thing I've always felt missing from the 95, and older cars on the fleet, is intermittent wipers. Fitted a kit previously to our Bond Bug, so bought the same thing for the 95 and followed a similar install for the 95. Made it so it's all reversible and no original wiring is cut or modified, could be removed in about five minutes. The dash light rheostat was completely kaput, and happily the rheostat for the intermittent kit fitted the hole exactly. I've wired it in such a way that the first position on the wiper stalk is now intermittent, with positions 2 & 3 are Speed 1 only. I would never really use Speed 2 in normal driving, so that has been isolated. It could be reinstated with an additional switch somewhere if required, but I don't think I'll miss it really.
https://flic.kr/p/2iHu6QJ
Put together a quick sketch of how the intermittent wipers were wired up - retaining all the original wiring and making it fairly simple to do.

1970 95 V4 van
1972 Sonett 3
1973 95 V4 estate | | Doive | Posted - 14 Apr 2021 : 09:06:48
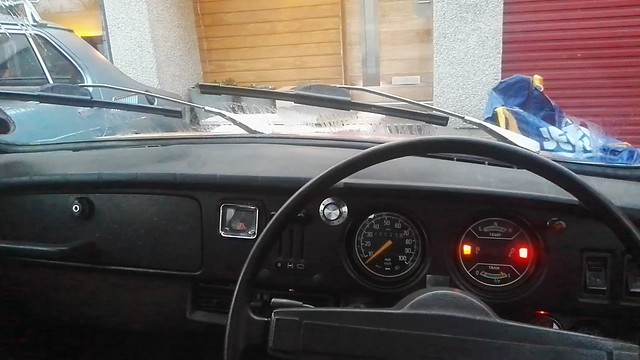
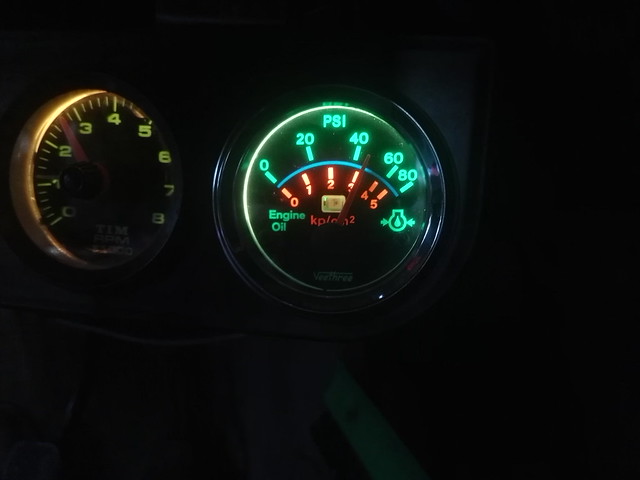
Revising the gauge installation on the 95, originally I installed a vacuum gauge, rev counter and voltmeter. Then I installed an oil pressure gauge in place of the voltmeter, when the low oil pressure showed up and led to the engine rebuild. Now I'm paranoid about monitoring the condition of the engine, so decided to install an oil temperature gauge in place of the vacuum gauge, and re-install the voltmeter, with moving the rev counter into a pod on the driver's screen pillar. Lots of wiring work! Decided to use terminal blocks for ease of installation, instead of bullet or spade connectors. Much neater job & easier to add to if required. All tidied up now and tucked away behind the gauges with cable ties.

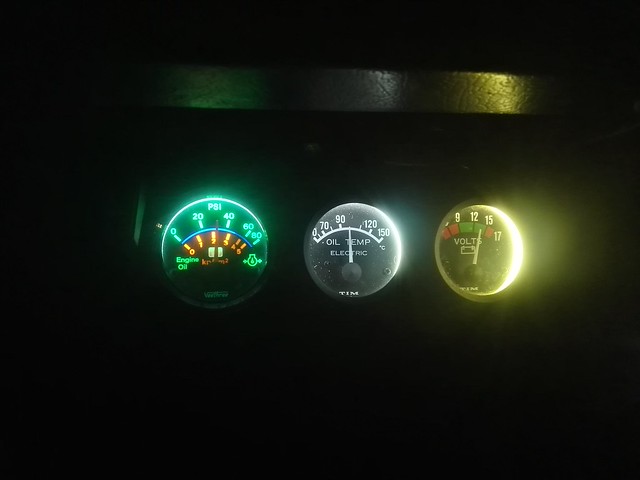
Night picture after installation, with new LED bulbs. Everything is intended to be reversible, so no holes drilled anywhere.

After a 20 minute drive of mixed roads - oil pressure around ~30psi hot idle, and oil around 100C. On a longer motorway run to work it gets up to around 110C on an uphill climb at 65mph, but quickly drops away again when the load is removed. Oil pressure never drops below 30psi, so I'd say that's healthy.
1970 95 V4 van
1972 Sonett 3
1973 95 V4 estate | | Doive | Posted - 14 Apr 2021 : 09:03:47
Dropped the running in oil for a service, and am fitting an oil temperature gauge - probably overkill, but you can never have too many gauges. Was also wiring in the indicator telltale by means of a small extension loom between the column plugs, as the original setup was wired off a separate take-off from the mechanical flasher relay. The modern LED type flasher relays are so sensitive that the tiny 1.2W grain bulb is enough to trigger the relay, so the telltale needs to wired into the switched lamp side of the circuit. Easily done with a couple of diodes.
Whilst upside down under the dashboard with the seat out, I casually removed one of the warning lamps, and realised I had the right replacements in LED available, as they also fit an Austin Allegro... and thus spent a somewhat cramped two hours trying to contort hands into all sorts of positions to replace them all. Gah. Half of the illumination bulbs hadn't worked previously, so the LEDs made a big difference. All except the alternator charge light, which needs to remain as a filament bulb to allow charging.

1970 95 V4 van
1972 Sonett 3
1973 95 V4 estate | | Doive | Posted - 14 Apr 2021 : 09:01:33
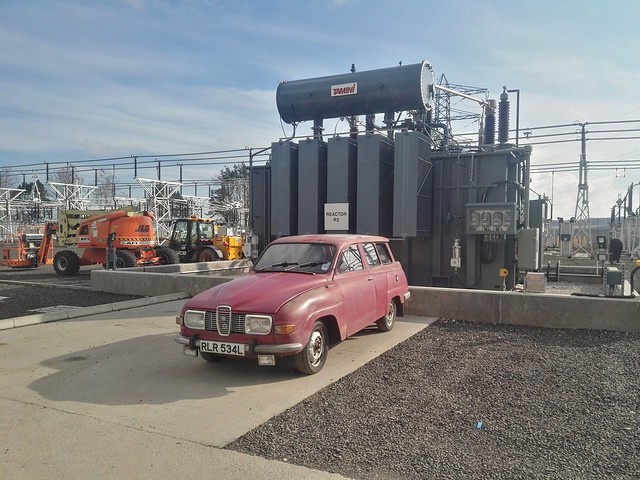
Now up to 500 miles on the rebuilt engine, been running it on Shell V Power with Castrol Valvemaster Plus lead additive and octane booster - it now pulls happily uphill in 4th gear, where before with the old engine it would have laboured and struggled. Time to give it a service. Been taking it to site visits with work, which have been a source of much hilarity. Most of younger guys (under 40!) have no idea what it is, and quite a few of the older guys remember them from their youth. Arriving at one site I was greeted by a welcoming party - apparently they could hear the Jetex exhaust coming over a mile away...
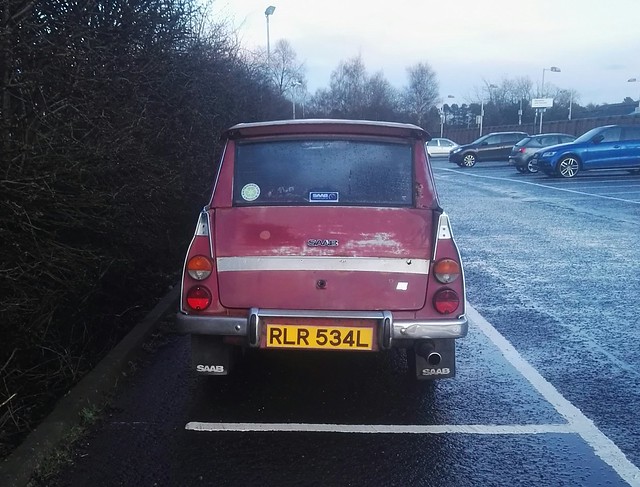
When parked at the office, one colleague remarked to me "you like your Saabs, have you seen that old Saab in the car park? It's falling apart, more rust than metal, and most of the paint has fallen off... the seats are falling apart... it must be ancient, it can't be safe." I assured him it was perfectly safe, thank you very much, with all new brakes, tyres, an engine rebuild, and everything was firmly attached and secure. This is the same guy who is 'nursing' an eight year old Peugeot 207SW to avoid having to replace the front wheel bearings, which are howling like wolves and at risk of imminent collapse. It's barely done 56k miles, and is riddled with electrical and mechanical faults. Old Saabs are much more dependable than modern Peugeots!
1970 95 V4 van
1972 Sonett 3
1973 95 V4 estate | | Doive | Posted - 14 Apr 2021 : 08:58:44
Been using the old lady for gradually longer and faster journeys, so drove 60 miles round trip to work last Friday. Cruised happily at 65mph on the motorway with plenty left, engine feels like it's freeing up nicely now there's 250 miles on the clock. Tweaked the mixture and idle speed again as it was pinking slightly uphill in top, but it doesn't half pull well. Oil pressure seems good too - over 50psi cold idle, only dropping to 40ish psi when hot. Another 250 miles and I'll give it an oil change from the 'running in' oil, do the valve clearances again, check various torques.
1970 95 V4 van
1972 Sonett 3
1973 95 V4 estate | | Doive | Posted - 14 Apr 2021 : 08:56:05
Finally an update for the 95. Fitted up all the new bits of cooling system, and ran the car up to temperature, keeping an eye on my newly fitted oil pressure gauge to see what the psi values were. Cold idle was ~20psi - not great. However, once the 'stat opened and the car was properly up to temperature, the oil pressure dropped to ~5psi, and both warning lights were flickering. The old stat had always run cool, so the car had never really ran hot. Suspected the balance shaft bearings, as there was a bit of play in them. Rebuilding engines is slightly beyond my capabilities, so it was shipped off to the guys at Dirty Hands in Kirkcaldy to poke it with big sticks.

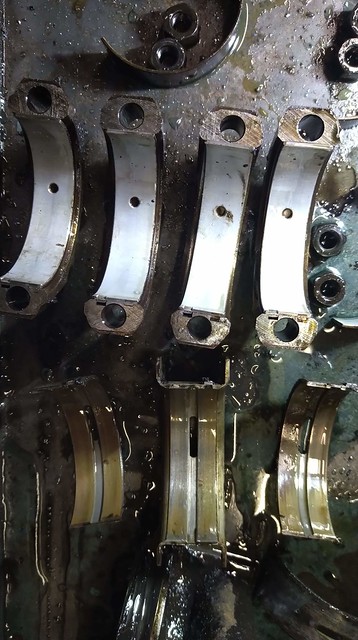
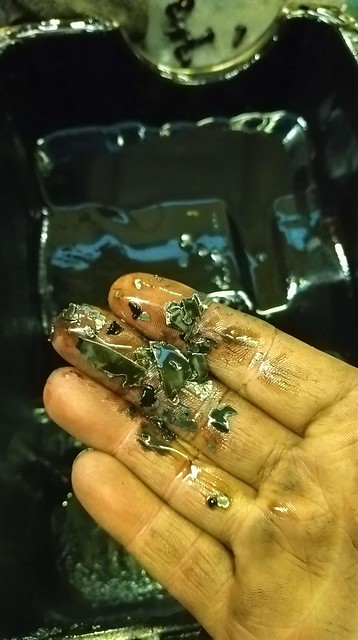
On stripping down everything appeared in reasonable condition, but the bearings were quite worn, and evidence of shell in the sump. Oddly enough the balance shaft bearings were in fairly good condition, no obvious signs of degradation or breakup.
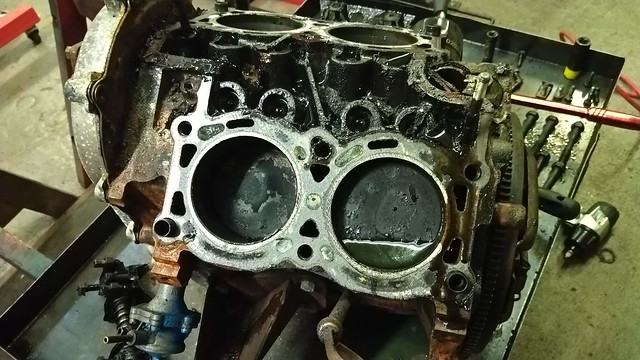
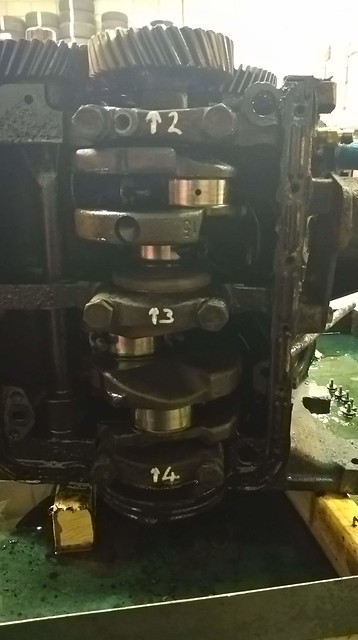
One of the big ends had picked up slightly and scored it's crank journal.
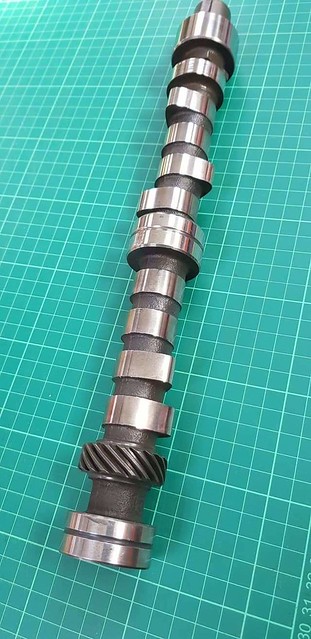
The bores were also quite worn, with ovality and evidence of a lip around the top. The block was taken to Agra in Dundee, where much sucking through teeth was done on inspecting the block. They advised a 1mm overbore as a minimum. Speaking to Steve at Malbrad, he could source oversize pistons, but only in the shorter skirt 1700 size. Given the scoring to the crank, we decided to source a 1700 crank from Melle and parts to suit from Malbrad. Agra cleaned and machined the block to suit. The cam was also found to have worn lobes, so John Green kindly supplied a good one from his stash of spares.
The clutch was found to be in serviceable condition with a bit of life left, but we decided to replace it anyway. BillJ at Saabits was able to source an OE spec Sachs clutch set from Germany. The original will be relined and kept as a spare.

Finally with all the parts sourced and machining work done, the rebuild could commence. Er, well not quite. The pistons supplied were found to be 91.835mm, while the overbore was 91mm - 1mm oversize. So the block went back to Agra with pistons, to be bored to match. Works out that with the 1700 crank, this should give us a displacement of 1770cc.
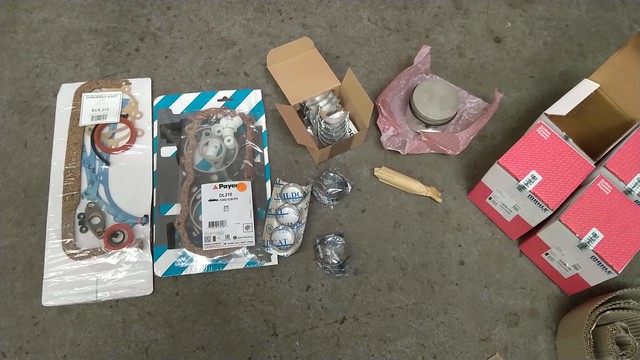
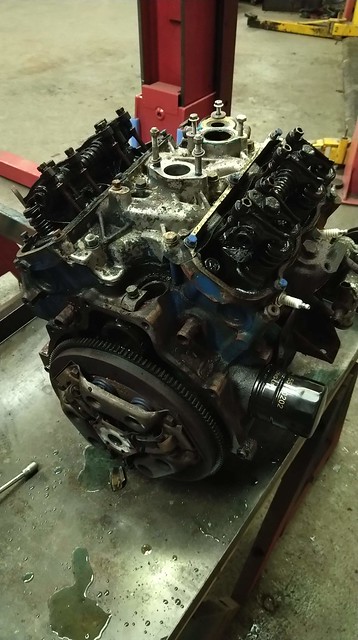
The engine ready to go back into the car. Decided not to spend lots of time and money cleaning and painting everything to as-new condition. The car itself is intended to be a presentable and reliable workhorse, not a show queen.

Running the engine in now, so gentle trips around town and a few longer ones out and about. Fitted the electric cooling fan, and tweaked the carb settings to richen the mixture slightly. Runs well and pulls cleanly. First impressions are a noticeable increase in low down torque, and it seems so much more tractable at low speeds. Keeping the revs down for the first few hundred miles, so driving gently. Feels great to be behind the wheel again!
1970 95 V4 van
1972 Sonett 3
1973 95 V4 estate | | Doive | Posted - 14 Apr 2021 : 08:53:39
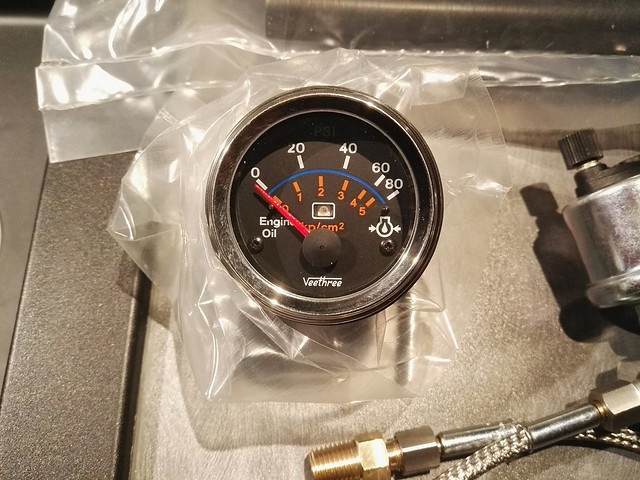
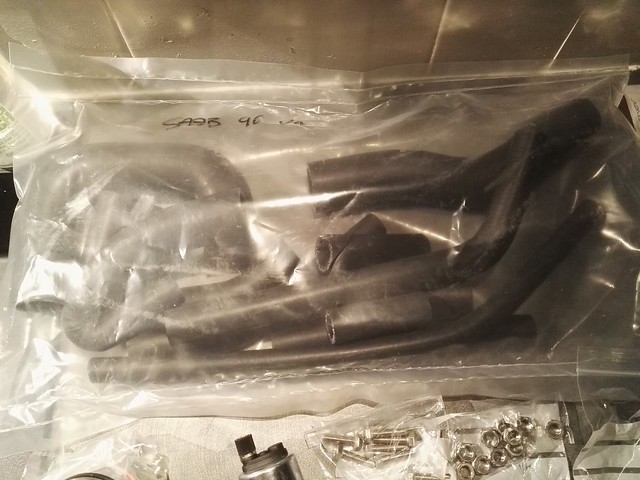
Bought a few presents for the 95, new oil pressure gauge & adaptor, full set of coolant hoses, and various stainless fixings for all the brackets, etc.
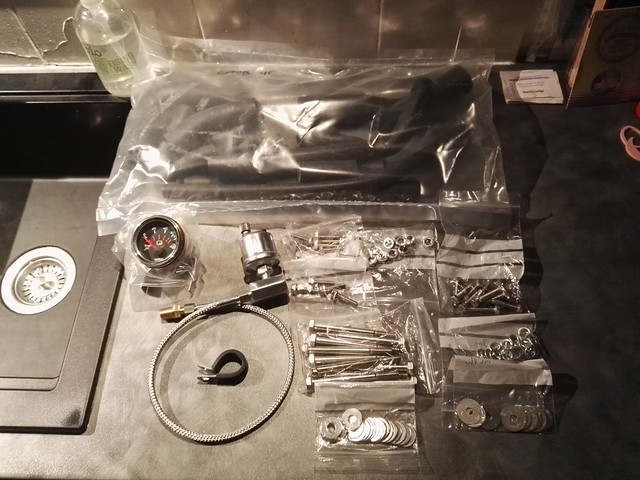
It's a fairly cheap gauge & electric sender, so I'm not expecting startling accuracy, but indicative is good enough.
New hoses were far from cheap, but the condition of the ones on the car mean it's a false economy to refit them.
It's a completely miserable, dreich day here, and the car is outdoors, so it won't all be getting fitted today sadly.
1970 95 V4 van
1972 Sonett 3
1973 95 V4 estate |
|
